Table of Contents
Let's be honest, wrapping gifts can sometimes feel like a chore, especially when you're just shoving something into a generic paper bag or a flimsy store-bought box. It lacks... effort. It lacks personality. You've picked out a thoughtful gift, maybe even something truly special, and then you wrap it up like you grabbed the box from a clearance bin five minutes before the party.
Why DIY Your Gift Box?
Why DIY Your Gift Box?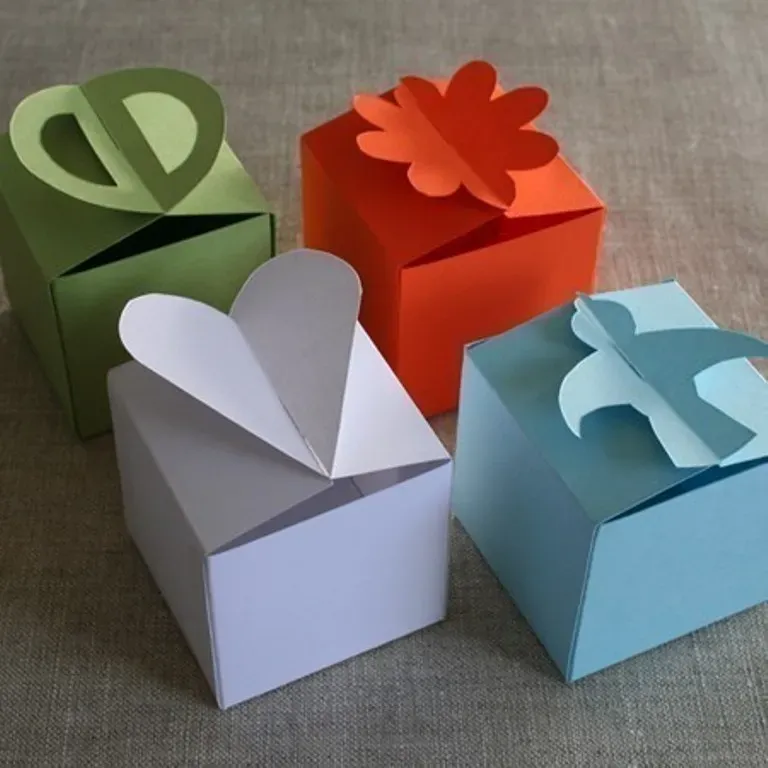
Escape the Generic Gift Bag Abyss
seriously. How many times have you received a gift shoved into a mass-produced bag with tissue paper that immediately deflates? It's the visual equivalent of a shrug. When you put the effort into a 3d gift box diy, you're telling the recipient this gift, and they, are worth more than an afterthought. It adds a layer of anticipation, a tactile experience before they even see what's inside. It shows you didn't just grab the first thing you saw at the checkout counter.
More Bang for Your Buck (and Way More Style)
Buying fancy gift boxes, especially those with any sort of interesting shape, can cost a ridiculous amount. You pay for convenience, sure, but you also get something everyone else can buy. A 3d gift box diy project lets you control the materials, the colors, and the overall vibe. You can match it perfectly to the gift, the occasion, or the recipient's personality. Plus, you can often use materials you already have lying around, making it significantly cheaper than hitting up the stationery store.
- **DIY Box:** Unique design, fits the gift perfectly, costs pennies, shows extra care.
- **Store-Bought Box:** Generic shape, might not fit, surprisingly expensive, feels impersonal.
Essential Supplies for Your 3D Gift Box DIY Project
Essential Supplies for Your 3D Gift Box DIY Project
The Foundation: Paper and Cardstock
Alright, let's get down to brass tacks. You can't build a 3d gift box diy without something to build it from. Forget printer paper; it's too flimsy. You need cardstock, the heavier stuff. Think weight, measured in pounds or grams per square meter (gsm). For sturdy boxes, aim for 65lb (176gsm) or higher. Patterned paper is great for decoration, but the structure needs that backbone. You'll want a few different colors or patterns to make things interesting. Don't be afraid to mix and match textures too.
Cutting and Creasing Tools
Precision is key here. You can hack at paper with kitchen scissors, but your box will look like a toddler made it. A good craft knife (like an X-Acto) and a self-healing cutting mat are non-negotiable for clean lines. Even better, a paper trimmer with a scoring blade attachment is a game changer. Scoring is just making a crease line so the paper folds neatly. Without scoring, you get jagged, awkward folds. A bone folder helps make those creases super crisp. Trust me, a wobbly box is a sad box.
What's the most common mistake when cutting paper for a box?
Sticky Stuff and Sparkle
How do you hold this paper sculpture together? Liquid glue is fine, but it can warp paper if you use too much. Double-sided tape or a good quality craft glue stick is often cleaner and faster. For stronger bonds, like tabs that hold the box together, a strong liquid adhesive designed for paper is your friend. Then comes the fun part: decorating. Ribbon, stickers, glitter, markers, stamps – whatever makes your 3d gift box diy pop. This is where you inject personality, turning a simple structure into something memorable.
StepbyStep Guide to Your First 3D Gift Box DIY
StepbyStep Guide to Your First 3D Gift Box DIY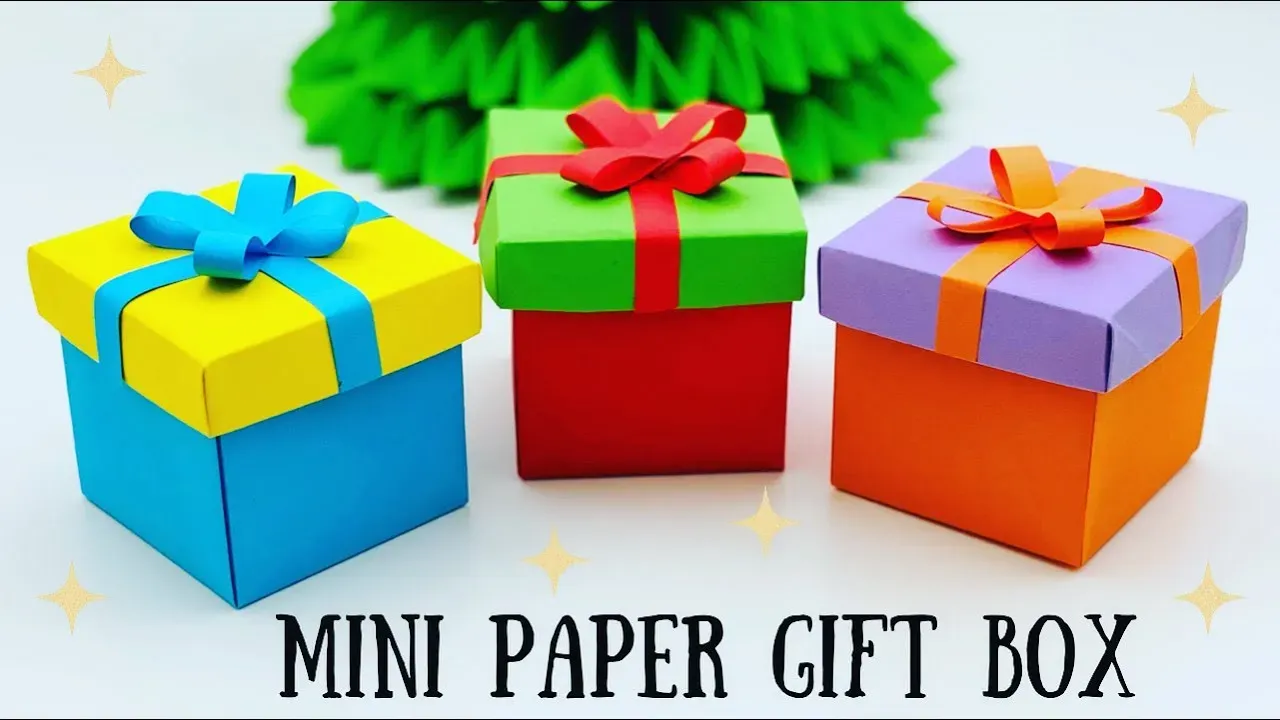
Picking Your Pattern (Don't Wing It)
Alright, you've got your sturdy paper and sharp tools. Now, don't just grab a sheet and start folding randomly like you're trying to remember that one weird origami crane you made in third grade. You need a pattern or a template for your 3d gift box diy. The internet is lousy with them – free printables, SVG files for cutting machines, even simple diagrams. Start with something basic, like a simple cube or a rectangular prism. Trying to tackle a twelve-sided dodecahedron for your first go is just setting yourself up for frustration and probably some colorful language.
Find a template that looks manageable. Print it out on regular paper first to do a test run. This lets you see how it folds and if the size is right without wasting your good cardstock. Think of it as a dress rehearsal, but for paper. If the test run looks good, transfer the lines (either by printing directly onto your cardstock or tracing) onto your chosen paper. Make sure you know which lines are cuts and which are folds. This is crucial. Messing this up means starting over, and nobody wants that.
Cutting and Scoring: The Precision Play
This is where the magic happens, or where it all goes horribly wrong if you rush it. You've got your template lines on your cardstock. Now, carefully, methodically, make your cuts. Use that craft knife or paper trimmer. Stay on the lines. A wobbly cut is a visual disaster. Think surgeon, not lumberjack. Once the cutting is done, it's time for scoring. Remember that scoring tool or the back of your craft knife (use light pressure!) or your paper trimmer's scoring blade? Use it on every single fold line.
Scoring creates a channel in the paper fibers, allowing it to bend cleanly and precisely. Without scoring, your folds will be rounded and uneven, making the box look sloppy and less like a crisp, finished product. Press firmly enough to make a crease, but not so hard you cut through the paper. It takes a little practice to get the pressure right, but it’s worth it. You'll see the difference immediately when you go to fold.
Tool | Purpose | Why it Matters |
|---|---|---|
Craft Knife / Paper Trimmer | Cutting paper along lines | Ensures straight, clean edges for a professional look. |
Scoring Tool / Blade | Creating crease lines | Allows paper to fold sharply and accurately, preventing wrinkles. |
Bone Folder | Creasing folds | Makes folds crisp and flat, adding structure and neatness. |
Folding and Gluing: Bringing it Together
With all your pieces cut and scored, the structure of your 3d gift box diy is staring you in the face. Now, fold along all those scored lines. Use your bone folder to really press down and sharpen the creases. This gives the box its definition and helps it hold its shape. See those little tabs on the template? Those are your glue tabs. Apply your adhesive – double-sided tape is often the easiest for beginners, or a thin line of strong paper glue – to these tabs.
Carefully align the edges of the box as you fold and press the glue tabs into place. Hold them for a moment to let the adhesive grab. Work your way around the box, attaching tabs one by one until the basic structure is formed. Don't rush this. Misaligned edges are hard to fix and make the box look... handmade, but not in a good way. Take your time, align carefully, and you'll have a sturdy little box ready for the final touches.
Personalizing Your 3D Gift Boxes
Personalizing Your 3D Gift Boxes
Adding the Bling (or the Subtle Touch)
so you've got the basic structure of your 3d gift box diy locked down. It's sturdy, it folds cleanly, and it looks like a box should. Now comes the part that really makes it yours – or rather, the recipient's. This is where you move beyond just a paper container and turn it into a piece of the gift experience. Think ribbons. Not just any ribbon, but maybe velvet for a luxurious feel, or bright satin for something cheerful. Consider layering different types of paper – a patterned paper panel glued onto a solid cardstock base adds visual interest without much effort. Stamps are your friend here; you can stamp patterns, images, or even sentiments directly onto the box before you fold it. Don't underestimate the power of simple embellishments like buttons, twine, or even dried flowers. A well-placed detail can elevate a simple box into something truly special.
Tailoring it to the Human Receiving It
The real beauty of a 3d gift box diy isn't just that it's handmade; it's that you can make it specifically for the person getting it. Are they obsessed with cats? Find some cat-themed paper or stamps. Do they love a certain color? Build the box entirely in shades of that color. Is it for a specific event, like a baby shower or a graduation? Incorporate themes related to that. It's about showing you thought about them, not just the gift inside. This level of personalization is impossible with a store-bought box unless you get it custom-made, which costs a fortune. Your handmade box is a silent message that says, "I see you, and I put time into this just for you." It's the difference between a generic card and a handwritten letter.
- **For the Minimalist:** Use clean lines, solid colors, maybe a single piece of twine.
- **For the Maximalist:** Go wild with layers, glitter, stickers, and multiple ribbons.
- **For the Nature Lover:** Incorporate earthy tones, natural textures, maybe a pressed leaf.
- **For the Bookworm:** Use paper that looks like old book pages, or add a tiny paper scroll.
Your Handmade Box, Their Happy Face
So there you have it. Building a 3d gift box diy isn't about mastering some ancient craft or spending a fortune on supplies. It's about taking a few simple materials and turning them into something that shows you gave a damn. It adds a layer of thoughtfulness that a mass-produced box just can't replicate. Whether it holds a small trinket, a batch of cookies, or just a heartfelt note, a handmade box makes the moment feel a little more significant. Give it a shot. The worst that happens is you end up with a slightly lopsided box, which, frankly, probably has more character anyway.