Table of Contents
Introduction
Let's be honest. Handing over a flat, store-bought gift card can feel a bit… anticlimactic, right? It’s practical, sure, but where's the flair? Where's the personal touch? If you're tired of your thoughtful present arriving in a paper envelope that screams "I was in a hurry," it's time to level up. Forget the generic. This article is your guide to crafting a memorable **diy 3d gift card**. We're not talking about some flimsy pop-up that collapses if you look at it funny. We're diving into how to create miniature paper worlds, clever compartments, and dimensional designs that make the act of giving the card itself part of the gift. We'll walk through the simple steps for beginners, explore ways to add serious 'wow' factor, and even tackle those annoying moments when things don't quite go according to plan. Ready to make your gift card stand out? Let's get started.
Why Bother with a DIY 3D Gift Card?
Why Bother with a DIY 3D Gift Card?
More Than Just Plastic
Let's face it, pulling a standard plastic gift card out of a plain envelope feels a bit like unwrapping a receipt. It lacks soul. It screams convenience, maybe, but not necessarily care. When you choose to make a **diy 3d gift card**, you're not just giving money or credit to a store. You're giving a piece of your time, your creativity, and your effort. That transformation from flat paper to something with dimension makes the gift feel special, like you actually thought about the person and wanted to make the presentation memorable. It's a small act, but it changes the whole dynamic of the gift exchange.
Making an Impression
Think about the last time someone clearly put effort into something for you. Even if it was simple, that feeling sticks, right? That's the power of a **diy 3d gift card**. It shows you went the extra mile. The recipient sees the pop-up element, the layered design, or the clever little box you built, and they know this wasn't just grabbed off a rack at the grocery store checkout. It becomes a keepsake, something they might even keep long after the card's balance is spent. It turns a potentially impersonal gift into something personal and heartfelt. It’s about the presentation making the practical gift feel like a genuine present. Why go DIY 3D?
- Adds personal touch
- Shows effort and care
- Creates a memorable presentation
- Turns the card holder into a keepsake
- Makes a practical gift feel special
The Basics: How to Make Your First DIY 3D Gift Card
The Basics: How to Make Your First DIY 3D Gift Card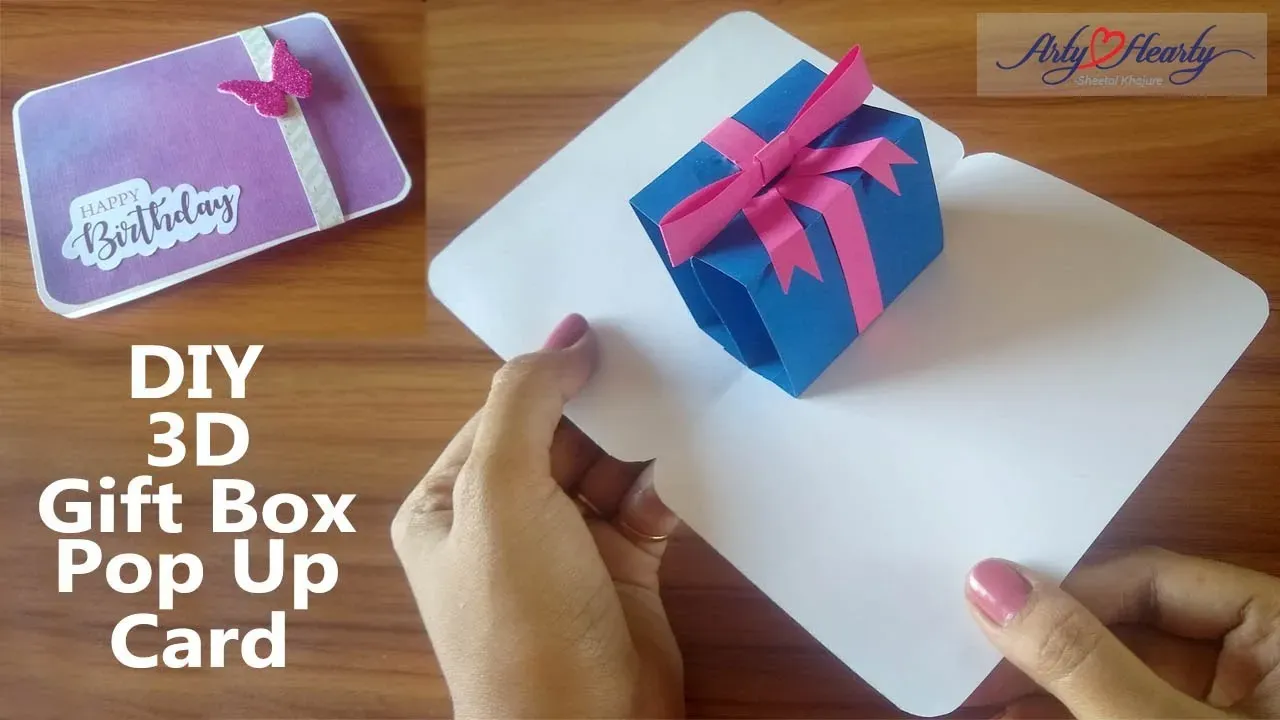
Starting Simple: The Pop-Out Slot
so you're sold on making a **diy 3d gift card**, but maybe your crafting skills peaked with macaroni art in kindergarten. No sweat. The easiest way to dip your toes in is the simple pop-out slot. Grab a piece of sturdy cardstock, fold it in half like a regular card. On the folded edge, make two parallel cuts, maybe an inch or two apart, cutting *into* the fold. The length of the cuts depends on how far you want your element to pop out. Now, open the card. See that little flap you created between the cuts? Push that flap *inward* so it folds the opposite way of the main card fold. When you close the card, that flap should stick out. This little ledge is your base. Now you can glue something onto it – a small cutout shape, a printed image, or even the gift card itself – and bam! When the card opens, that element pops forward, giving it instant dimension without needing an engineering degree.
Gathering Your Arsenal (It's Not That Scary)
Before you start snipping and folding your first **diy 3d gift card**, you need a few basic supplies. You don't need a dedicated craft room or a laser cutter. Just some cardstock – heavier than printer paper, lighter than cardboard – works well. Scissors are a must, obviously. A craft knife (like an X-Acto) with a cutting mat is incredibly helpful for cleaner cuts, especially those internal ones on the fold. You'll need some glue; a good strong glue stick or double-sided tape is often less messy than liquid glue for paper. And then, whatever you want to pop out or layer: colored paper scraps, printed pictures, stickers, maybe even a tiny plastic figure if you're feeling ambitious. Don't overthink it. Start with what you have around the house. What You Need for a Basic Pop-Out:
- Cardstock
- Scissors (or Craft Knife & Mat)
- Glue Stick or Double-Sided Tape
- Something to Pop Out (paper shape, image, etc.)
Taking Your DIY 3D Gift Card to the Next Level
Taking Your DIY 3D Gift Card to the Next Level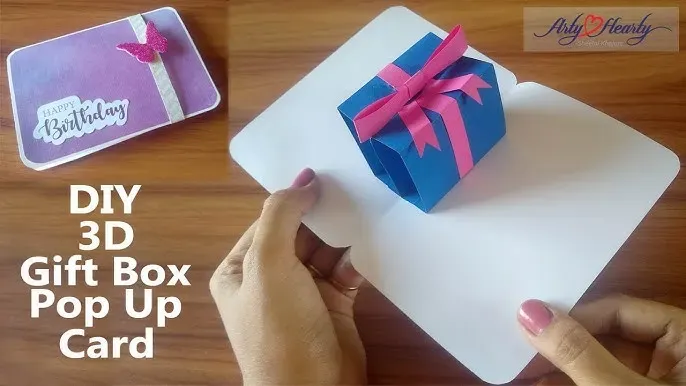
Beyond the Basic Pop-Out
Once you've nailed the simple pop-out slot for your **diy 3d gift card**, you might get the itch to try something a little more ambitious. This is where things get fun. You can experiment with multiple pop-out elements on the same fold, creating a little scene inside the card. Or try different cutting techniques on the fold itself – instead of just a straight line, cut a shape, and push that shape inward. It creates a more integrated pop-up. Another cool trick is the box pop-up, where cuts and folds create a small box or platform that springs forward when the card opens. It sounds complicated, but it's just a few more precise cuts and folds. Practice on scrap paper first; nobody gets it perfect on the first try. Think about the theme of the gift card – maybe a tiny paper cake pops up for a bakery card, or a miniature tree for an outdoor store.
Adding Layers and Texture
Making a **diy 3d gift card** isn't just about the pop-up mechanism; it's also about building dimension on the flat surfaces. Layering different shapes of paper with foam adhesive dots creates instant depth and shadow. This is great for building scenes or adding decorative elements that stand out. Think about using different materials too – maybe a small piece of fabric, some twine, or even tiny buttons. Quilling, the art of rolling paper strips into shapes, can add beautiful, intricate texture. Embossing folders can press patterns into the cardstock, giving it a tactile feel. These details take your card from "homemade" to "handmade with serious skill." Level Up Your DIY 3D Card:
- Try multiple pop-out elements
- Cut shapes into the fold for integrated pop-ups
- Learn the box pop-up technique
- Use foam adhesive for layered elements
- Add texture with fabric, twine, or buttons
- Experiment with quilling or embossing
Troubleshooting and Tips for Your DIY 3D Gift Card Projects
Troubleshooting and Tips for Your DIY 3D Gift Card Projects
When Things Don't Quite Pop (or Fold) Right
So you followed the instructions, made your cuts, pushed the flap, and... nothing. Or maybe it pops, but it's crooked, or it tears. Welcome to the club. Making a **diy 3d gift card** isn't always a seamless craft fair demonstration. Sometimes your cardstock is too thin, and it just buckles instead of folding crisply. Other times, your cuts weren't perfectly aligned, throwing the whole mechanism off. Don't toss it in the bin just yet. Often, you can reinforce a wobbly pop-up with a tiny piece of extra cardstock glued behind it. If a fold is tearing, a small piece of tape on the back can save it, hidden from view. Precision is key, but minor surgery is often possible.
Sharp Tools Save Sanity (and Paper)
Blunt scissors are the enemy of a clean **diy 3d gift card**. Trying to cut intricate shapes or straight lines on the fold with dull blades is a recipe for frustration and jagged edges. Invest in a decent pair of craft scissors and, if you're doing internal cuts, a sharp craft knife and a self-healing mat. Change the blade on your knife regularly; they get dull faster than you think, especially cutting through cardstock. For crisp folds, use a bone folder or even the back of a spoon to press down firmly along the fold line after you crease it. This compresses the paper fibers and gives you that sharp edge that makes 3D elements look professional. What's worse than a dull blade?
- Stepping on a LEGO brick in the dark.
- Realizing you're out of coffee.
- Getting glitter everywhere (and finding it for weeks).
Sticky Situations and Securing the Goods
Glue is your friend, but it can also be your undoing when crafting a **diy 3d gift card**. Too much liquid glue can wrinkle the paper and seep out, making a mess. Too little, and your carefully constructed pop-up detaches the moment the card is opened. Experiment with different adhesives. A good quality glue stick works for adhering flat layers, but for pop-up mechanisms or heavier embellishments, double-sided tape or even a strong craft glue might be better. When it comes to attaching the actual gift card, avoid gluing it permanently! Create a slot or a small paper pocket on the card's surface or within the 3D element to tuck the gift card into. This keeps it secure but easily removable for the recipient.
More Than Just Paper: Wrapping Up Your 3D Creation
So there you have it. You've gone from a flat piece of cardstock to a mini-sculptural presentation for that otherwise standard rectangle of plastic. It took a bit more effort than grabbing a generic holder off the rack, didn't it? But look at the difference. A **diy 3d gift card** isn't just a vessel for the gift; it's a statement. It says you put thought into the *delivery*, not just the item being delivered. Whether it's a simple pop-up or an elaborate scene, you've added a layer of personality that no mass-produced option can match. Hopefully, this guide gave you the push (and the know-how) to try it out. Now go forth and make some cards that actually make people pause before they tear into the main present.