Table of Contents
Let's be honest. Sometimes the perfect gift gets lost in the wrapping paper aisle chaos. Those flimsy store-bought boxes? They often feel like an afterthought, a sad cardboard cage for something special. You've picked out something thoughtful, maybe even unique, and you want the packaging to reflect that effort. That's where the magic of a diy gift box comes in. It’s not about being Martha Stewart; it’s about adding a personal touch that store-bought simply can’t replicate. Think about the difference a beautifully crafted box makes before the recipient even sees what's inside. It builds anticipation, shows you truly cared about the whole presentation, not just the contents. Forget generic. We're diving into the surprisingly simple world of making your own boxes. This isn't some complex origami nightmare, either. We’ll walk through why making your own is a smart move, what basic stuff you'll need that you probably already have lying around, how to tackle the fundamental folding techniques, and then sprinkle in some ideas to make your box genuinely pop. Ready to ditch the boring and craft something memorable?
Why Bother with a DIY Gift Box Anyway?
Why Bother with a DIY Gift Box Anyway?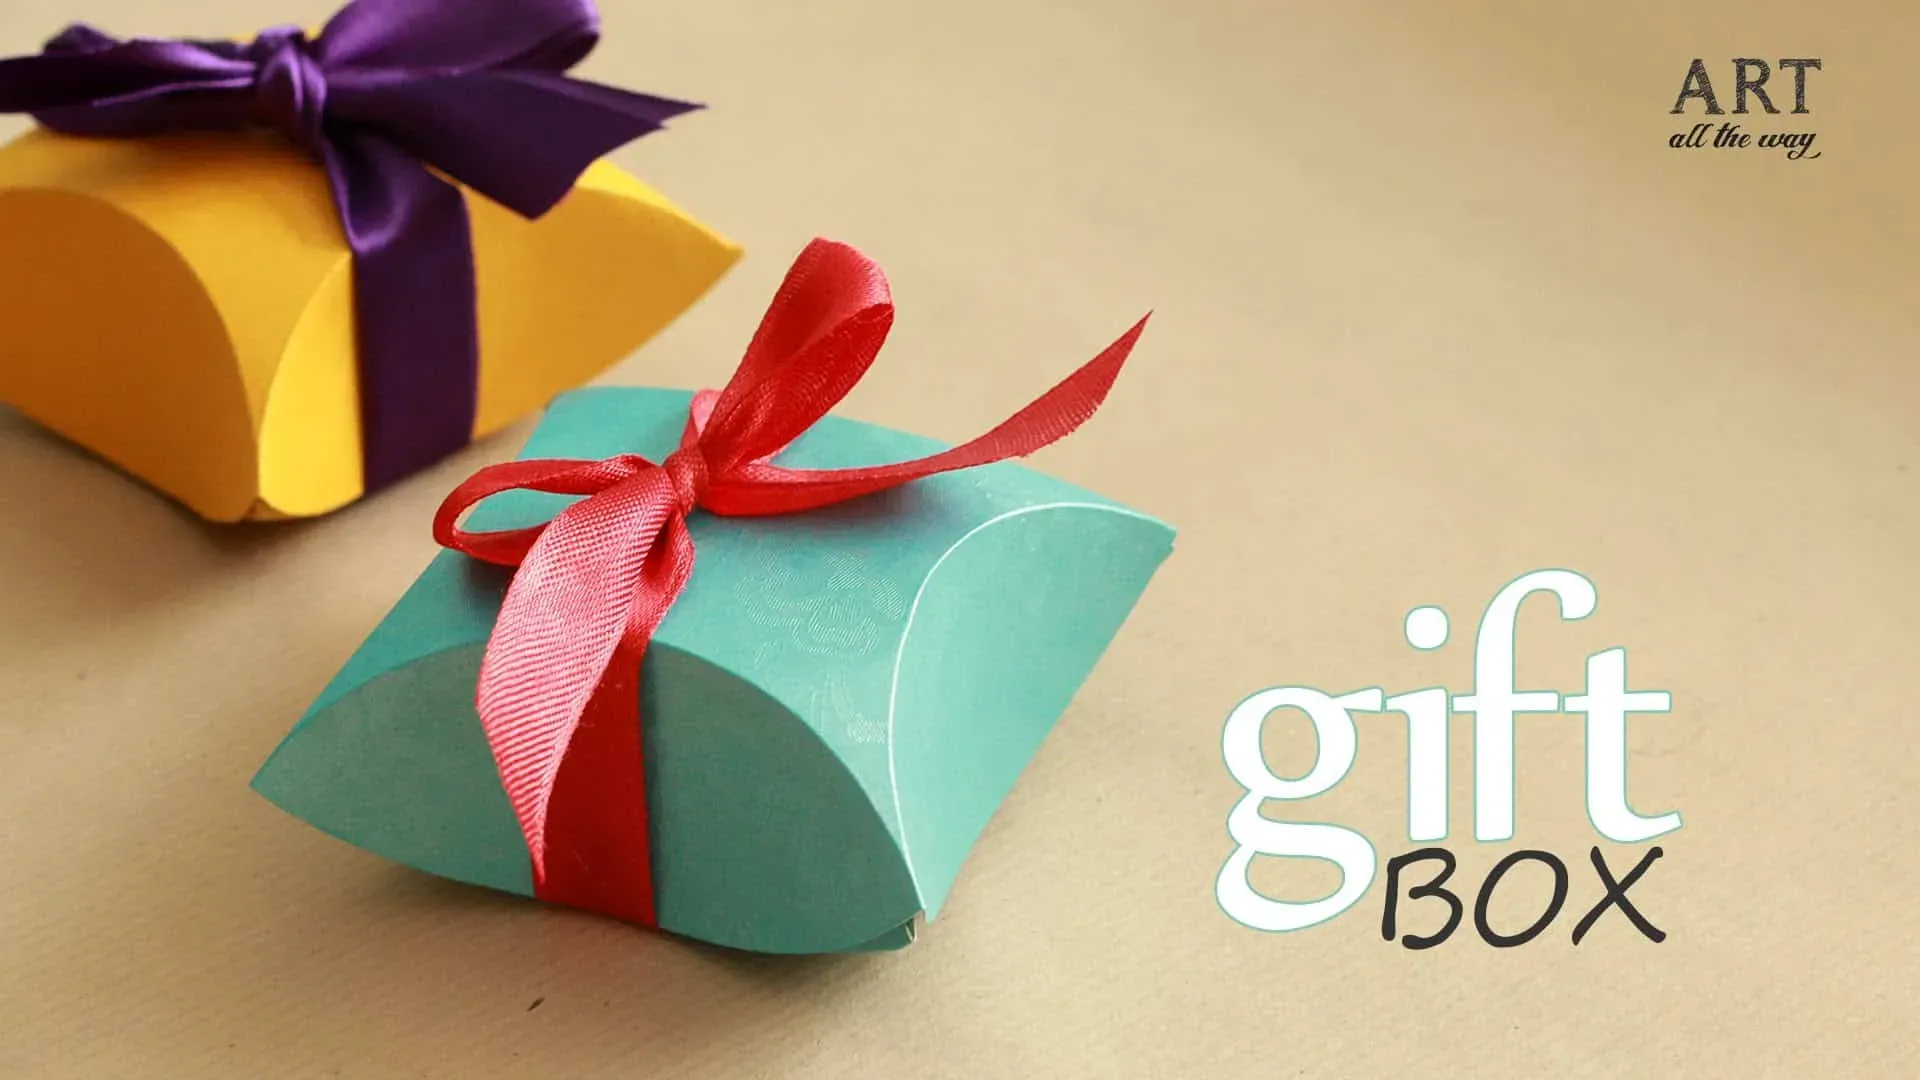
Ditch the Sad, Generic Cardboard
picture this: You spent hours hunting down the perfect gift, something truly thoughtful.
Then you shove it into a flimsy box from the dollar store, the kind that looks like it survived a wrestling match.
Does that really scream "I put effort into this"?
Making a diy gift box isn't about being extra; it's about giving the gift the entrance it deserves.
It's the difference between handing someone a crumpled grocery bag and presenting them with something crafted with care.
A handmade box adds layers of meaning before they even lift the lid.
It shows you considered the presentation, the unboxing experience, not just the item itself.
It’s a small detail, sure, but details matter.
Save Your Wallet and Get Exactly What You Need
Let's talk money and practicality.
Have you priced decent gift boxes lately?
They can cost a ridiculous amount for what's essentially just folded paper or thin cardboard.
Making a diy gift box, especially from materials you already have, is significantly cheaper.
Beyond the cost, you get to make a box that's the exact size and shape you need.
No more trying to stuff an awkwardly shaped item into a standard square box.
Plus, you control the aesthetic – the color, the texture, the vibe.
You're not stuck with whatever limited options are left on the dusty store shelf.
It's practical, economical, and frankly, a bit more satisfying.
Here's a quick look at the upside:
- Adds a personal, thoughtful touch.
- Often costs less than buying.
- Allows for custom sizing and shape.
- Complete control over design and materials.
- More sustainable if you use recycled materials.
Gathering Your Supplies: What You Need for Your First DIY Gift Box
Gathering Your Supplies: What You Need for Your First DIY Gift Box
The Paper Predicament: Choosing Your Base Material
Alright, so you're sold on the idea of a diy gift box. Great. Now, what do you actually need to get started?
First up, the paper or cardstock.
Don't overthink this part. You don't need fancy, imported paper from a specialty craft store.
Seriously, look around your house.
Old calendars with cool patterns? Cereal boxes (the inside is usually plain)? Cardstock scraps from an old project?
Even plain printer paper works for tiny boxes, though cardstock gives you a sturdier result.
The key is something you can fold without it tearing immediately but sturdy enough to hold its shape.
Aim for something around 65lb or 80lb cardstock if you're buying new.
Thicker is better for bigger boxes that need to hold heavier items.
Sharp Objects and Sticky Stuff: Tools of the Trade
Next, you need to cut and stick things together.
A good pair of scissors is non-negotiable.
If you have a craft knife and a self-healing mat, even better; it makes cutting straight lines way easier.
A ruler is also your best friend for getting precise measurements and scoring fold lines.
Speaking of scoring, a bone folder or even the back of a butter knife helps create crisp folds, which makes your diy gift box look professional, not like a kindergartener made it.
For adhesive, basic white craft glue is fine for most paper.
Double-sided tape is quicker and less messy for securing edges.
Hot glue is great for adding embellishments but can warp thin paper if you're not careful.
Here’s a simple list of essentials:
- Paper or cardstock (recycled is a win!)
- Scissors or craft knife & cutting mat
- Ruler
- Bone folder or scoring tool
- Craft glue or double-sided tape
- Pencil for marking
Adding Flair: Optional Embellishments
Now for the fun part – making your diy gift box look less like a plain container and more like something special.
This is where you can really let your personality (or the recipient's) shine.
Ribbon is a classic for a reason.
Twine or string works too, for a more rustic feel.
You can use markers, paint pens, or stamps to add patterns or messages directly onto the box.
Stickers, glitter (use sparingly unless you want a glitter bomb), or small found objects like buttons or dried leaves can be glued on.
Think about the occasion and the person.
A simple kraft paper box with a sprig of greenery and some twine looks totally different from a bright, patterned box covered in glitter and stickers.
These little touches elevate the whole project.
Folding Fun: Simple Steps for Basic DIY Gift Boxes
Folding Fun: Simple Steps for Basic DIY Gift Boxes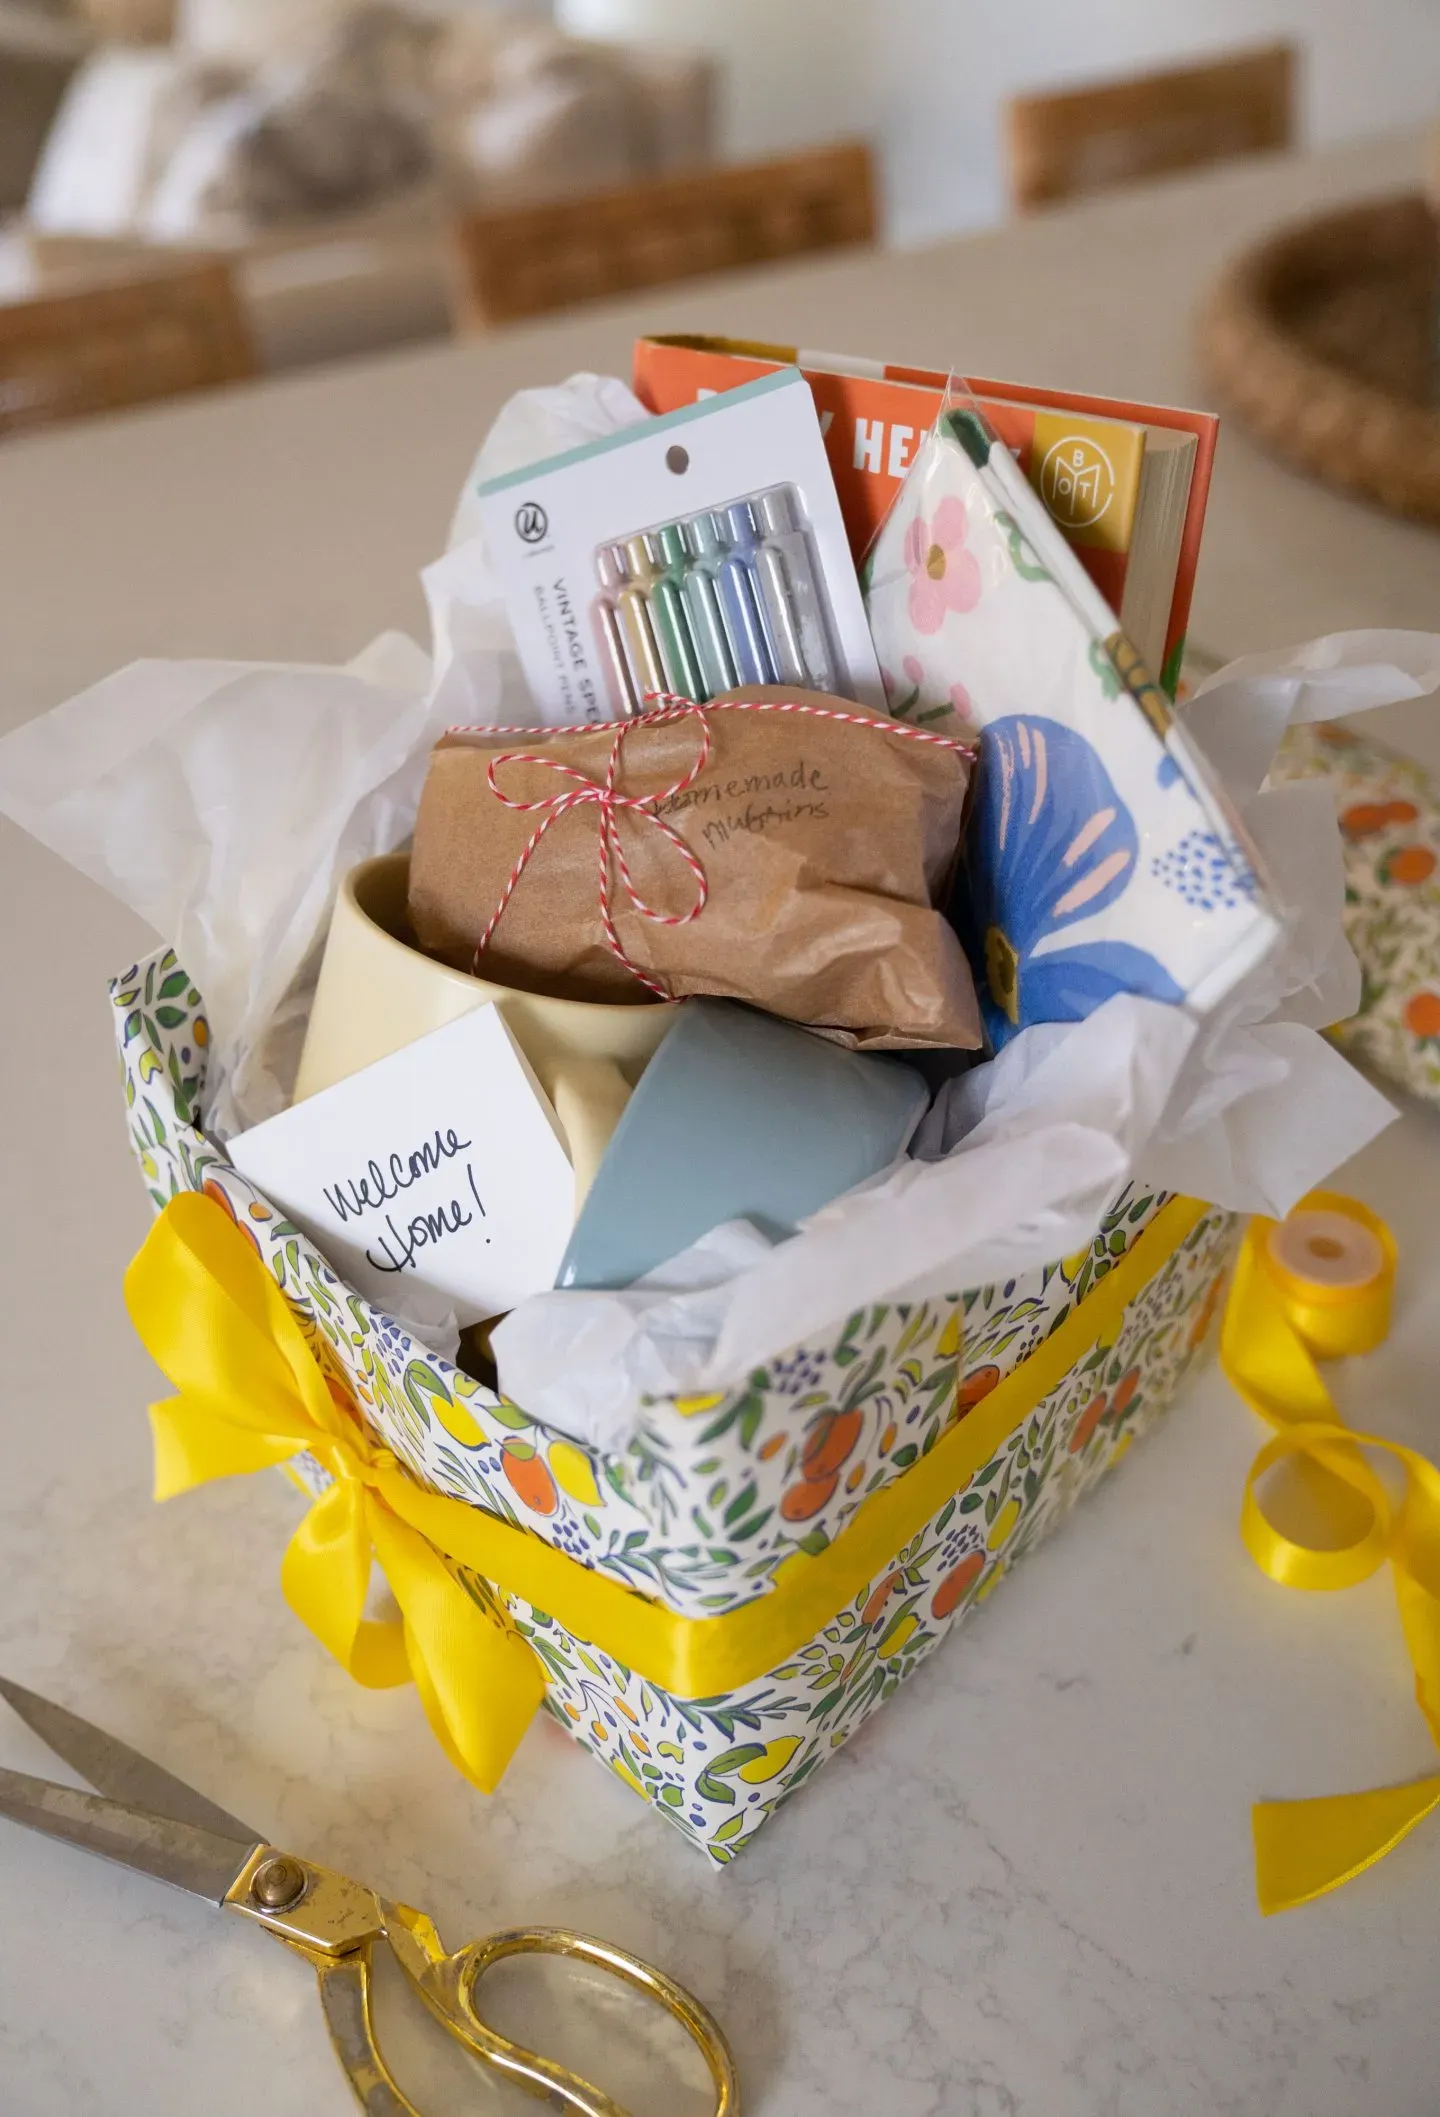
Getting Your Measurements Right
so you've got your paper or cardstock, your ruler, and something sharp to cut with. The first step for any basic diy gift box is getting the dimensions sorted. Don't panic; it's just measuring. Think about the item you're putting inside. You need a box slightly bigger than that, obviously. A good rule of thumb for a simple square or rectangular box is to figure out the desired width, length, and height of the finished box.
Let's say you want a box that's 4 inches wide, 6 inches long, and 2 inches high. For the main box piece (the bottom), you'll start with a rectangle of paper. The width of your paper needs to be the width of the box PLUS twice the height (4 + 2 + 2 = 8 inches). The length of your paper needs to be the length of the box PLUS twice the height (6 + 2 + 2 = 10 inches). So, you'd cut an 8x10 inch rectangle for the bottom.
For the lid, you do almost the same thing, but you need the lid to be just a tiny bit bigger so it fits over the bottom. Add about 1/16 or 1/8 of an inch to your final box dimensions before adding the height. So, for our example lid, you might aim for a box size of 4.125 x 6.125 x 2 inches (or whatever height you want for the lid's side wall, maybe just 1 inch). Then calculate the paper size: (4.125 + 1 + 1) x (6.125 + 1 + 1) which is 6.125 x 8.125 inches. This slight difference is key so the lid slides on.
Score, Fold, and Secure Those Sides
Once your paper rectangles are cut (one for the bottom, one for the lid), it's time to make those fold lines. This is where your ruler and scoring tool (or butter knife) come in. On your paper rectangle, measure in from each edge by the height you want for the box sides. For our 4x6x2 inch box bottom, you'd measure in 2 inches from all four edges and draw a light line with your pencil or score it firmly with your scoring tool. Do this on both the length and width sides.
After scoring all four sides, you'll see a rectangle in the center – that's the bottom of your box. You'll also have four squares in the corners and four rectangles along the sides. Now, take your scissors and cut along the score lines ONLY on the short sides, up to where they meet the score line coming from the long side. This creates four flaps.
Here's a visual helper for the cuts:
- Imagine your scored paper flat.
- Cut along the score line extending from the shorter edge.
- Stop cutting when you hit the score line coming from the longer edge.
- Do this on all four corners. You'll be cutting two lines per corner.
Now, fold up all your scored lines. The four flaps you just cut will fold inwards. Put glue or double-sided tape on the outside of these flaps. Then, fold the longer side panels up and press them against the glued flaps. Hold for a moment to secure. Repeat for the other side. Voila! You have a basic box bottom. Do the same for your slightly larger lid piece.
Simple Box Styles to Start With
That basic box with a separate lid is your fundamental building block for a diy gift box. It's sometimes called a "lid and base" box or a "telescoping" box because the lid fits over the base.
Another super simple option is a "pillow box." These are great for small items like jewelry or gift cards. You basically cut out a shape that looks like a rectangle with curved ends (like a pill capsule). Score lines down the length create the folds, and then you just fold the curved ends in and secure them. They naturally puff out in the middle like a little pillow.
For slightly sturdier items, you could try a "tray and sleeve" box. This involves making a shallow tray (like the box bottom we just made, but shallower) and then a sleeve that slides over it. The sleeve is just a rectangle folded into a loop and glued. It's a clean look and adds a bit more structure.
Don't feel pressured to start with something complicated. Mastering the simple lid and base or the pillow box is a great entry point into making your own packaging. You can always get fancier later.
Level Up Your Look: Creative Ideas for Decorating Your DIY Gift Box
Level Up Your Look: Creative Ideas for Decorating Your DIY Gift Box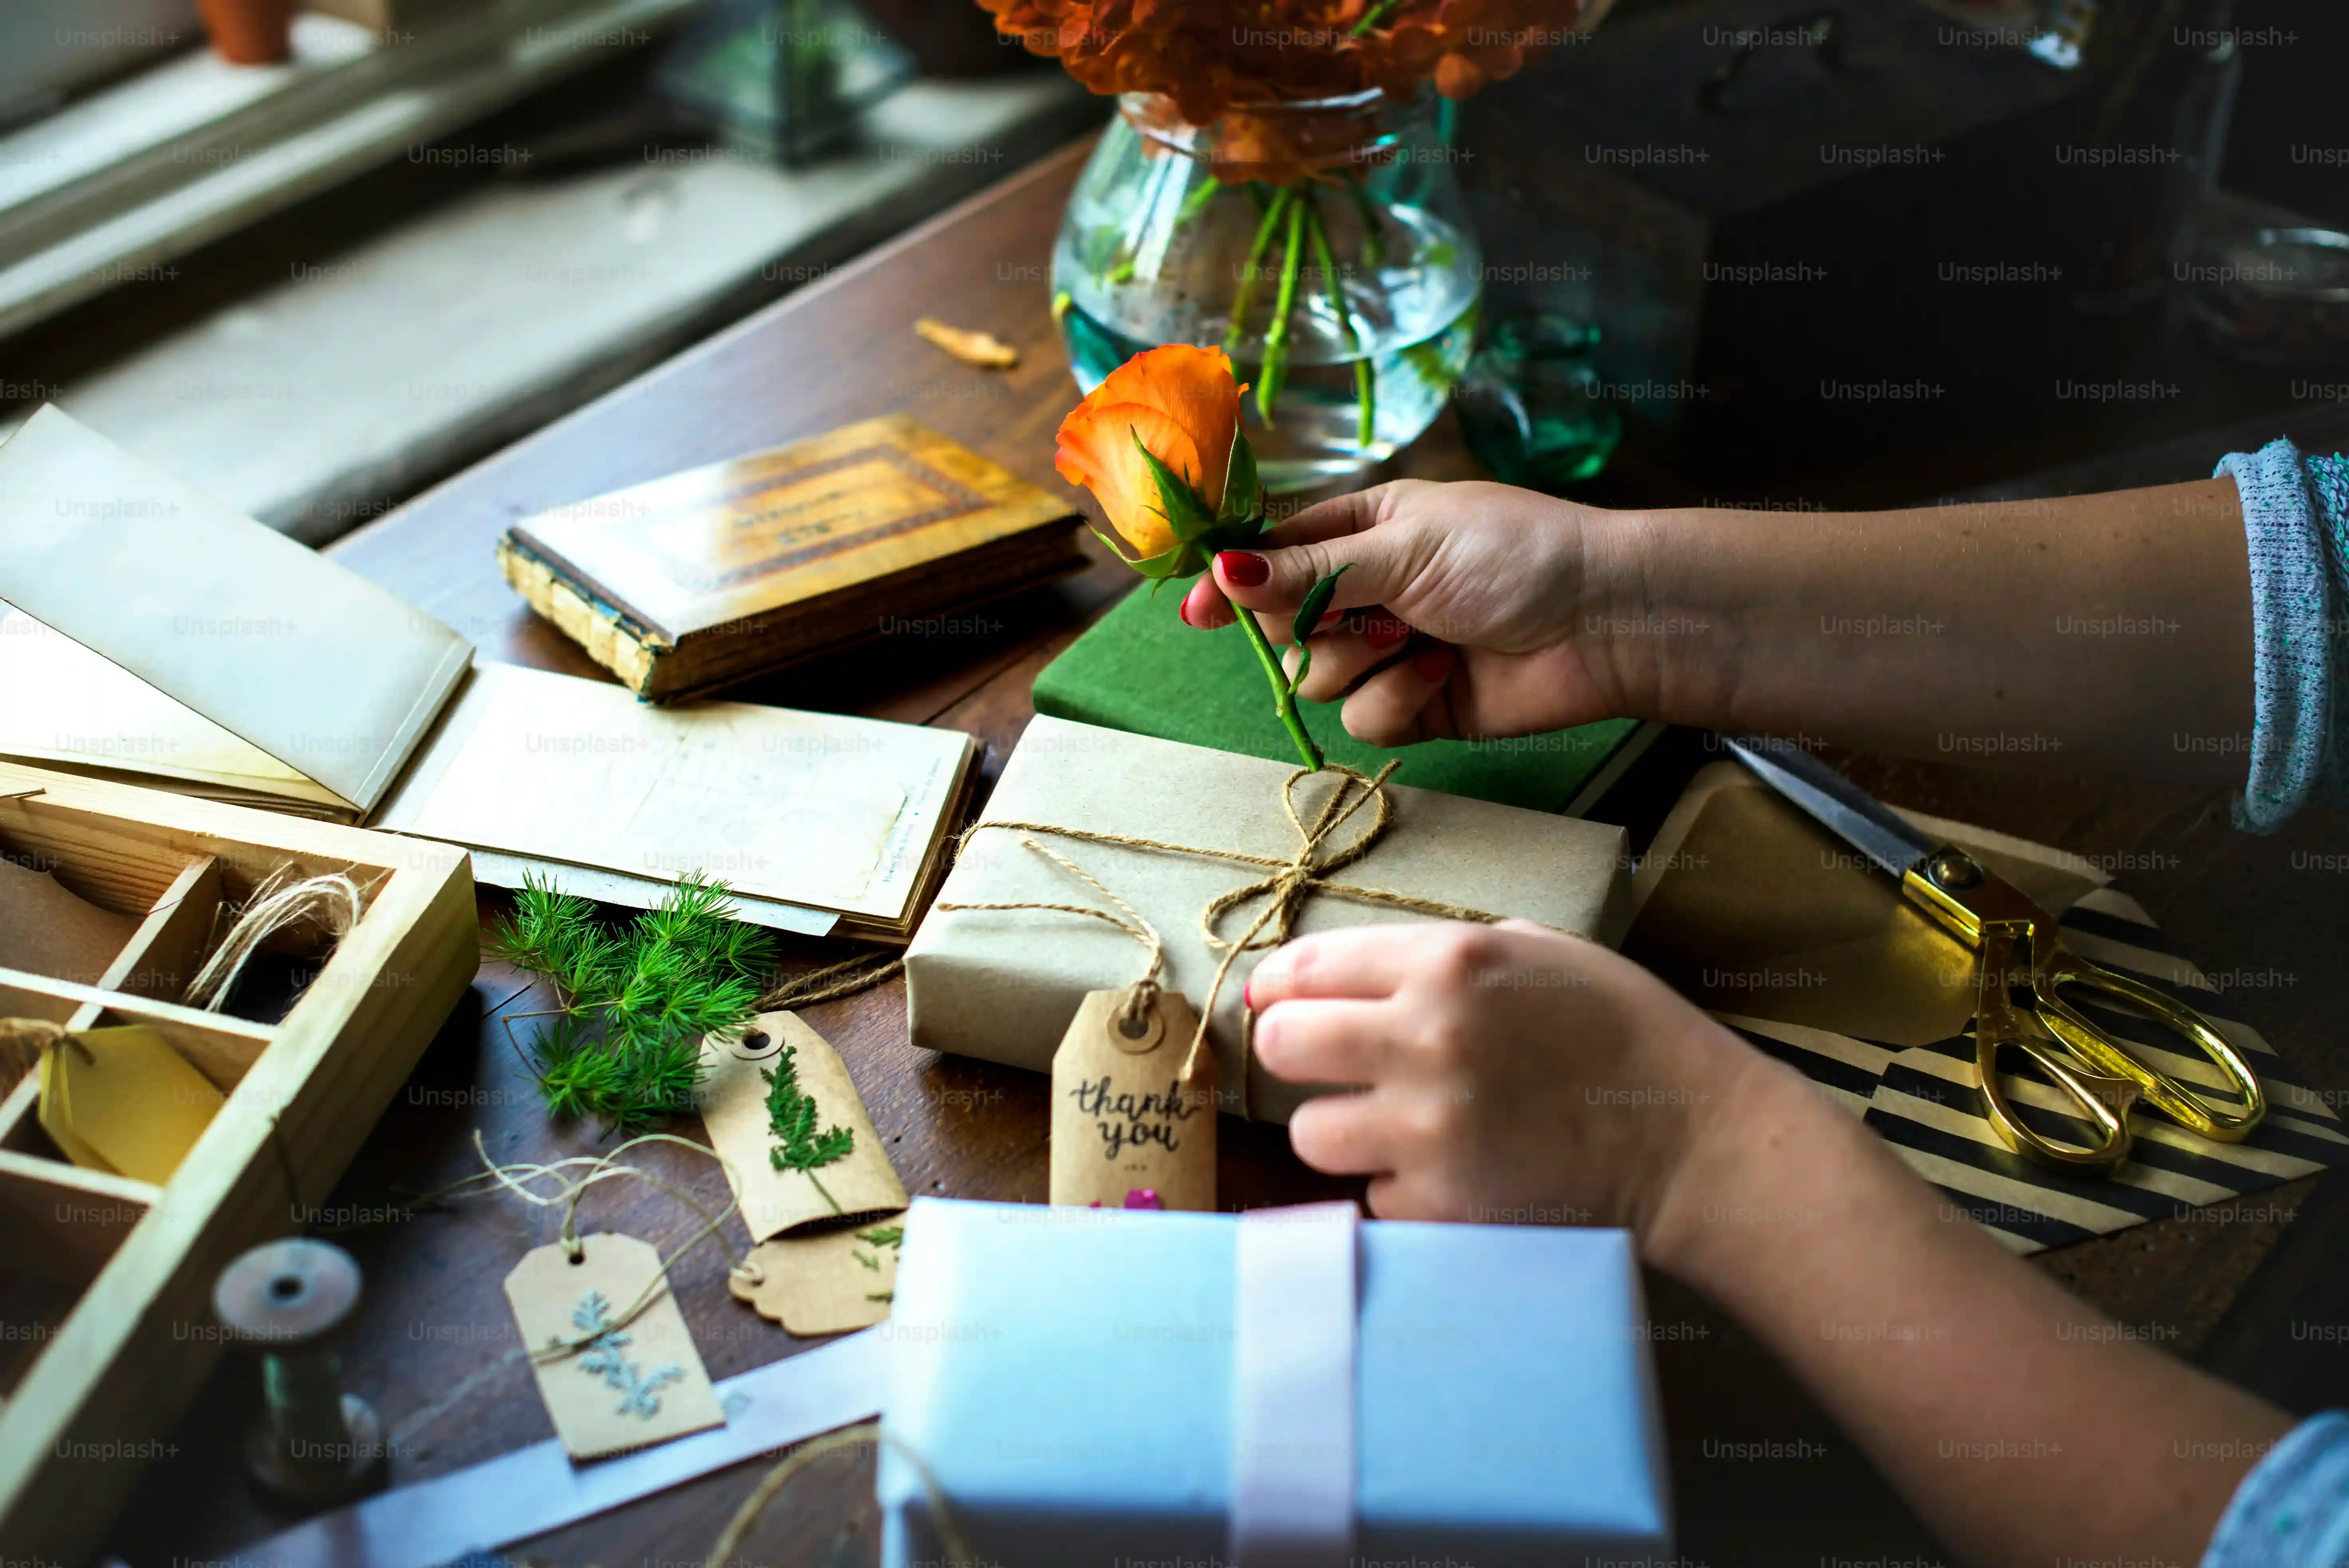
Beyond Paper: Playing with Textures and Materials
you've got your basic diy gift box structure down. It's functional, it holds the thing, great. But let's be honest, a plain paper box, while practical, isn't exactly winning any beauty contests. This is where you make it sing. Think beyond just gluing on more paper. What about fabric scraps? A bit of burlap or lace can totally change the feel. Old maps? Sheet music? Pages from a discarded book (maybe not a library book)? You can decoupage these onto the box for a really unique look.
Consider texture. Glue on some small pebbles, sand, or even dried pasta shapes for a tactile element. Wrap the box in twine or yarn for a rustic vibe. The goal here is to add visual and physical interest. It's about making someone pause and actually look at the box before they rip it open. It shows you didn't just fold paper; you created something.
Making it Personal: Messages, Art, and Memories
This is where your diy gift box becomes more than just packaging; it becomes part of the gift itself. Instead of just signing a card, write a message directly on the box. Draw something. Doodle. If you're not an artist, who cares? Your stick figures are probably better than anything I can do. Use stamps to create patterns or words. Print out photos – maybe pictures of you and the recipient – and glue them on like a mini-album.
Think about inside the box too. You can line the inside with a contrasting paper, fabric, or even a relevant image. It’s like a little surprise when they open it up. Personal touches like these turn a simple box into a keepsake. I once made a box for a friend's birthday using old concert ticket stubs we'd saved. Took longer than just wrapping paper, sure, but the reaction was worth it.
Some quick ways to personalize:
- Write a message directly on the lid or sides.
- Draw or paint a design.
- Use rubber stamps or stencils.
- Glue on meaningful photos or mementos.
- Line the inside with patterned paper or fabric.
The Finishing Touches: Ribbons, Tags, and Trinkets
You've built and decorated your diy gift box, and it's looking pretty good. Now, don't forget the final flourishes. A well-chosen ribbon can tie the whole look together (pun intended). Satin ribbon is classic, but consider grosgrain, velvet, or even simple twine depending on the style. Tie it in a neat bow or just wrap it around and secure with a knot.
A gift tag is essential, and guess what? You can make those yourself too using leftover paper. Cut out a simple shape, punch a hole, and tie it on with a bit of ribbon or string. Add a small trinket to the ribbon – a dried flower, a jingle bell for the holidays, a small charm. These small additions elevate the perceived value and thoughtfulness. It's these little details that transform a handmade container into a truly special piece of packaging that someone might actually want to keep.
Your DIY Gift Box Questions Answered (FAQs)
Your DIY Gift Box Questions Answered (FAQs)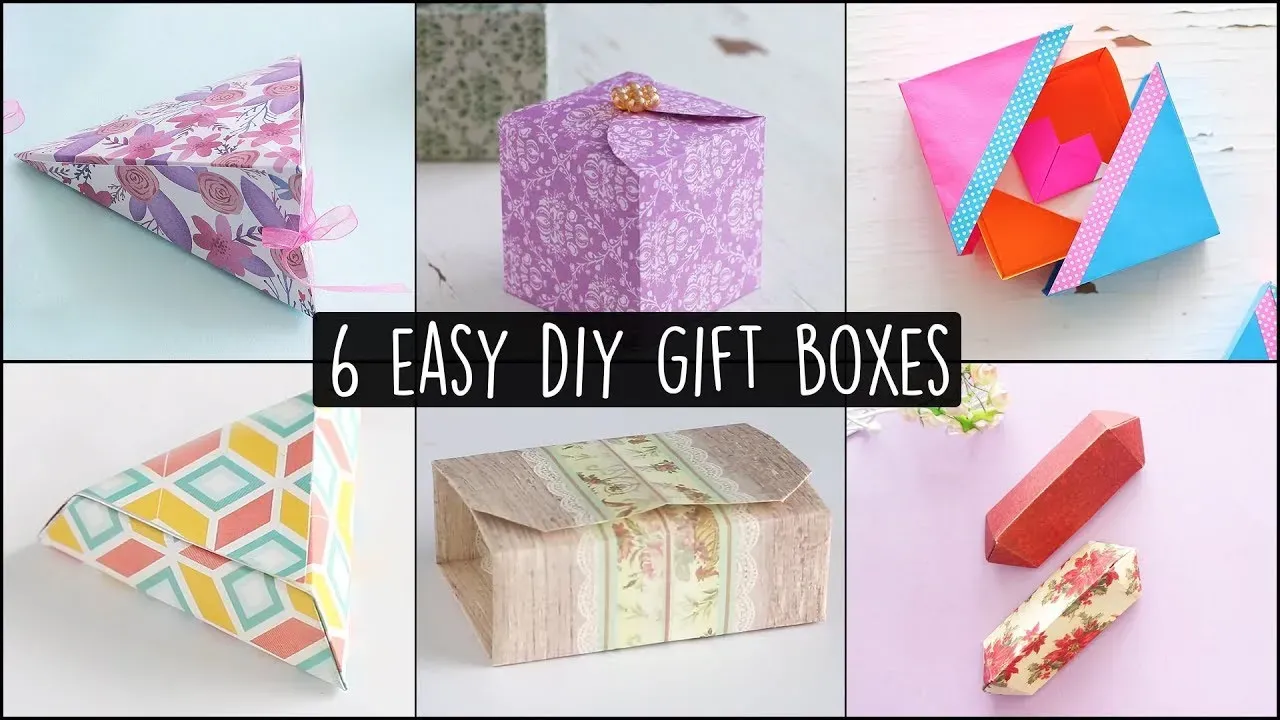
so you've seen how surprisingly straightforward making a diy gift box can be, but maybe a few lingering questions are bouncing around your head. Like, "Is this thing actually going to hold up?" or "What if I need a weirdly shaped box?" Good questions. Generally, a DIY box made with decent cardstock and proper adhesive will be sturdy enough for most gifts that aren't bowling balls or lead weights. The key is crisp folds and strong glue or tape on those tabs. If you're worried, consider reinforcing the inside seams with extra tape or using slightly heavier paper. For those odd shapes, that's where a bit of pattern-making comes in, but the principles are the same: measure your object, create a flat template that folds up around it, score, cut, and glue. It takes a little trial and error, maybe a practice run with scrap paper, but it's definitely doable. And if you're looking for endless inspiration or specific templates for tricky shapes, the internet is overflowing with tutorials and printable patterns once you know the basics we've covered here.
Wrap It Up: Your DIY Gift Box Masterpiece
So there you have it. You've navigated the paper folds, maybe wrestled with some glue, and hopefully didn't lose your mind. Crafting a diy gift box isn't about achieving Pinterest perfection on the first try. It's about making a deliberate choice to elevate the act of giving. It adds a layer of intention that a mass-produced box simply lacks. You took the time, put in the effort, and created something unique before the gift itself even saw the light of day. Whether it's a simple folded design or something a bit more elaborate, that handmade container carries a different weight. It says, "I thought about this," in a way that no store-bought option ever will. Now go forth and box things up with purpose.