Table of Contents
Tired of the same old boring gift bags and predictable paper? Let's be real, store-bought gift wrap can feel impersonal and, frankly, a bit blah. You put thought into the gift itself, so why not make the packaging just as special? This is where the magic of **DIY gift packaging ideas** comes in! Imagine the delight on someone's face when they receive a present that's not only thoughtful inside but beautifully crafted on the outside too. In this guide, we're diving into a treasure trove of amazing and easy DIY gift packaging ideas that will totally transform your gift-giving game. From simple swaps that make a big impact to fun techniques using everyday materials, get ready to unleash your creativity and learn how to make your presents truly unforgettable. We'll explore ditching the store-bought look, easy and fun DIY ideas, unique materials and techniques, and those all-important final touches that will make your DIY gift packaging shine. Let's get wrapping!
Creative Gift Presentation: Ditch the StoreBought Look
Creative Gift Presentation: Ditch the StoreBought Look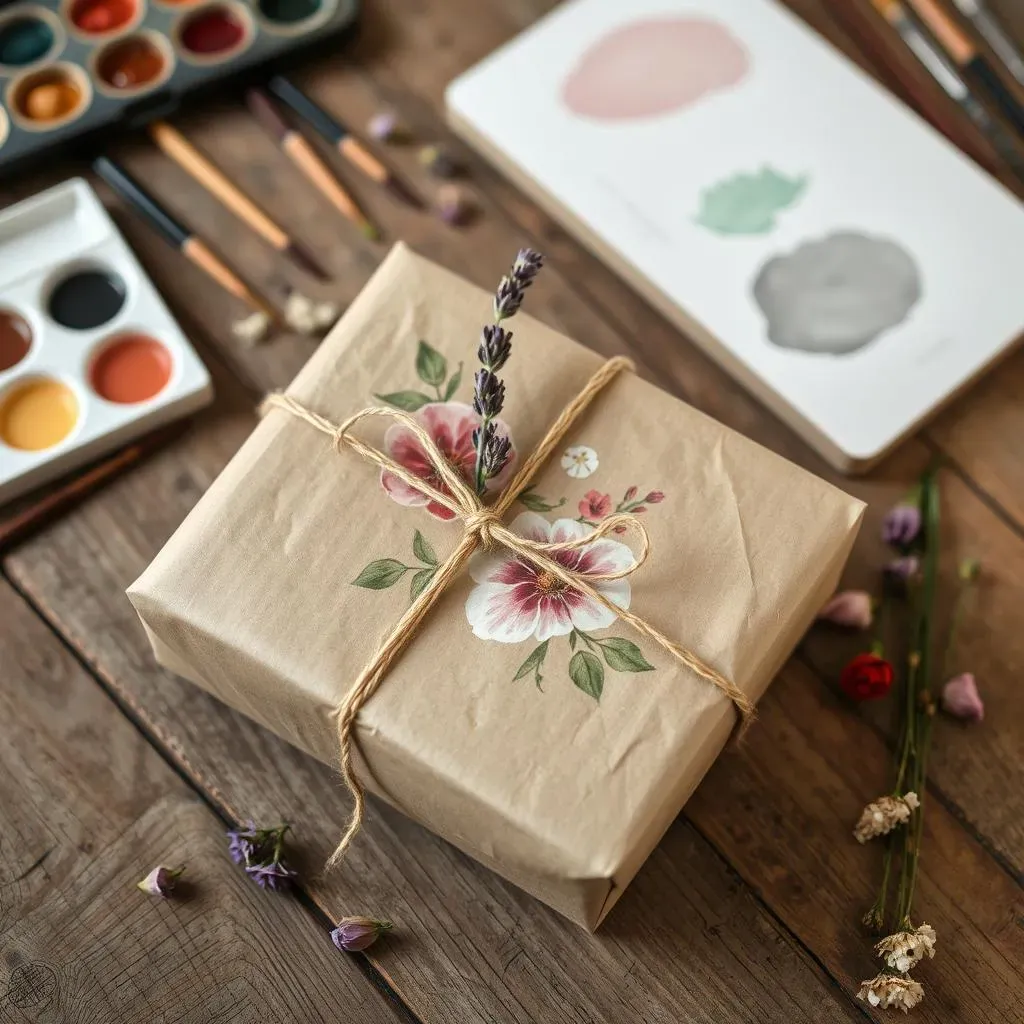
Let's face it, walking into any store and grabbing a roll of generic wrapping paper feels… well, generic. It's like saying, "Here's a gift, and I put minimal effort into how it looks." Seriously, those mass-produced rolls with the same predictable patterns? They scream last-minute rush, not heartfelt gifting. If you're aiming to make a real impression, and show someone you actually put thought into their present from start to finish, ditching the store-bought look is the first step towards awesome DIY gift packaging.
Think about it – when you receive a gift, the packaging is the first thing you see. It sets the tone, builds anticipation, and hints at what's inside. A creatively wrapped gift already feels more special, even before it's opened. It's like the difference between a fast-food burger and a home-cooked meal. Both are food, sure, but one clearly has more care and personality baked right in. DIY gift presentation is your chance to inject that personality, to make your gift stand out from the pile, and to show the recipient they're worth a little extra effort. Plus, let's be honest, crafting your own gift wrap can actually be kind of fun! It's a chance to get a little creative, maybe even a little crafty, and definitely a lot more thoughtful than just grabbing the nearest roll of reindeer-covered paper.
Store-Bought Gift Wrap | DIY Gift Packaging |
|---|---|
Generic and impersonal | Unique and personalized |
Often wasteful and non-recyclable | Can be eco-friendly and sustainable |
Limited design options | Endless creative possibilities |
Feels like an afterthought | Shows extra thought and effort |
Amazing DIY Gift Packaging Ideas That Are Easy & Fun
Amazing DIY Gift Packaging Ideas That Are Easy & Fun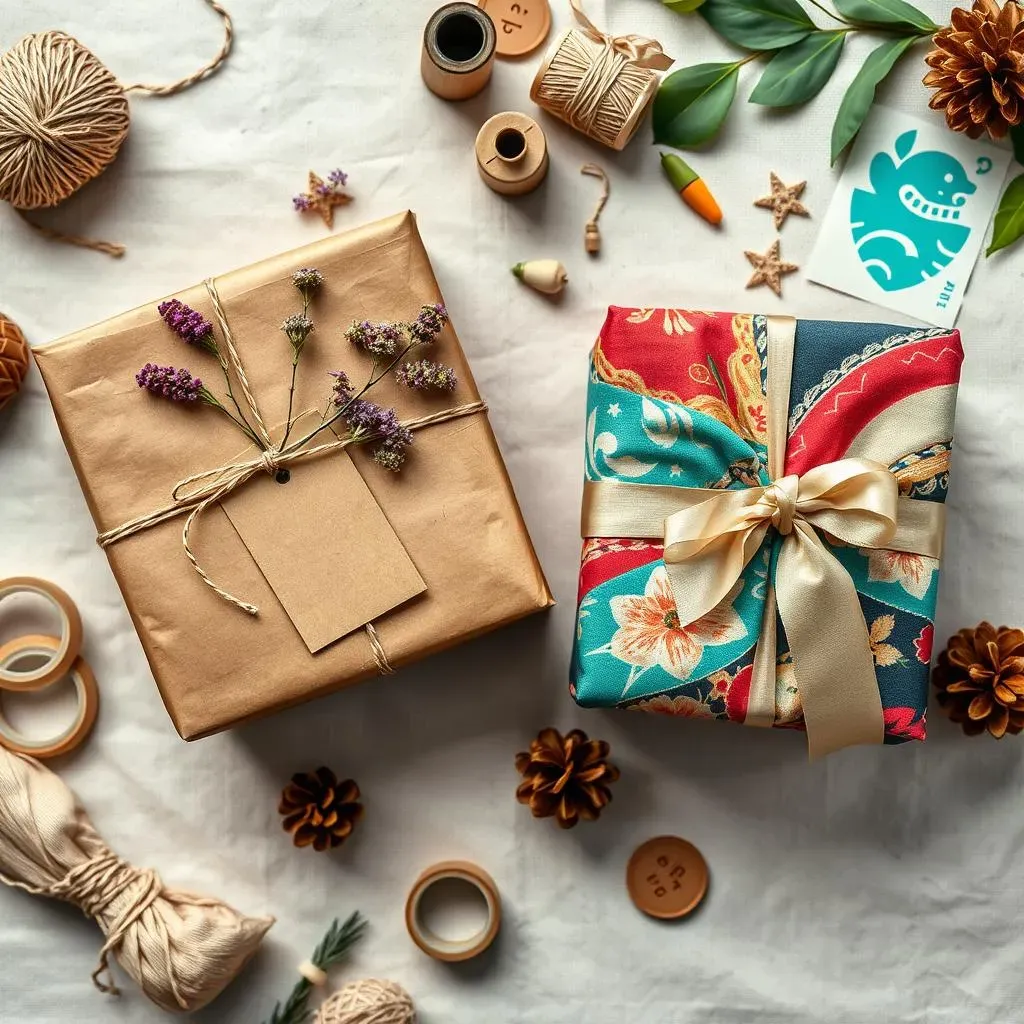
Brown Paper Basics: Seriously Versatile
Let’s talk about brown paper. Yeah, the stuff you might get groceries in. Don't underestimate it! Brown paper is like the blank canvas of DIY gift packaging. It's cheap, it's readily available, and it looks surprisingly chic when you jazz it up a bit. Think of it as the LBD of gift wrap – totally adaptable. You can go rustic, minimalist, or even kinda fancy depending on how you style it. Seriously, grab a roll of brown kraft paper, and you're already halfway to creating some amazing DIY gift packaging.
Now, how do you take brown paper from basic to brilliant? Easy. Start with some string or twine. Wrap it around your package a few times, maybe tie a little bow or knot. Boom, instantly more charming. Then, raid your craft supplies (or even your backyard!). Got some spare buttons? Glue a few on. Dried flowers? Tuck them under the string. Pinecones from your last nature walk? Perfect! The beauty of brown paper is that it makes anything you add to it pop. It's the ultimate easy and fun way to make your gifts look Pinterest-worthy without spending a fortune or needing a craft degree.
Brown Paper Packaging - Level Up | How To |
|---|---|
Twine & Tags | Use natural twine, add handmade or kraft tags. |
Stamps & Stencils | Use ink stamps or stencils for patterns or messages. |
Nature's Decor | Incorporate leaves, twigs, pinecones for a rustic touch. |
Washi Tape Magic | Use colorful washi tape to create stripes, patterns, or borders. |
Fabric Scraps: Wrap it Up, Sustainably!
ditch the paper altogether for a sec. Have you ever thought about using fabric to wrap gifts? Seriously! Fabric scraps are where it’s at for unique and eco-friendly DIY gift packaging. Think about it – old scarves, leftover fabric from sewing projects, even tea towels can get a new life as gorgeous gift wrap. It’s like giving a gift to the planet while you're at it, and it looks way more interesting than regular paper, trust me.
The cool thing about fabric is the texture and patterns you can play with. A silky scarf adds instant elegance, while a piece of burlap gives a rustic vibe. Plus, fabric wrap is reusable! It's like a gift that keeps on giving. You can tie it up furoshiki-style (that's Japanese fabric wrapping, super chic!), or just use ribbons or twine to secure it. Get creative with knots and folds, and suddenly your gift looks like it came straight out of a boutique, not your closet. And the best part? You're using up scraps that might otherwise end up in the trash. Bonus points for being sustainable and stylish!
Materials & Techniques for Unique DIY Gift Packaging
Materials & Techniques for Unique DIY Gift Packaging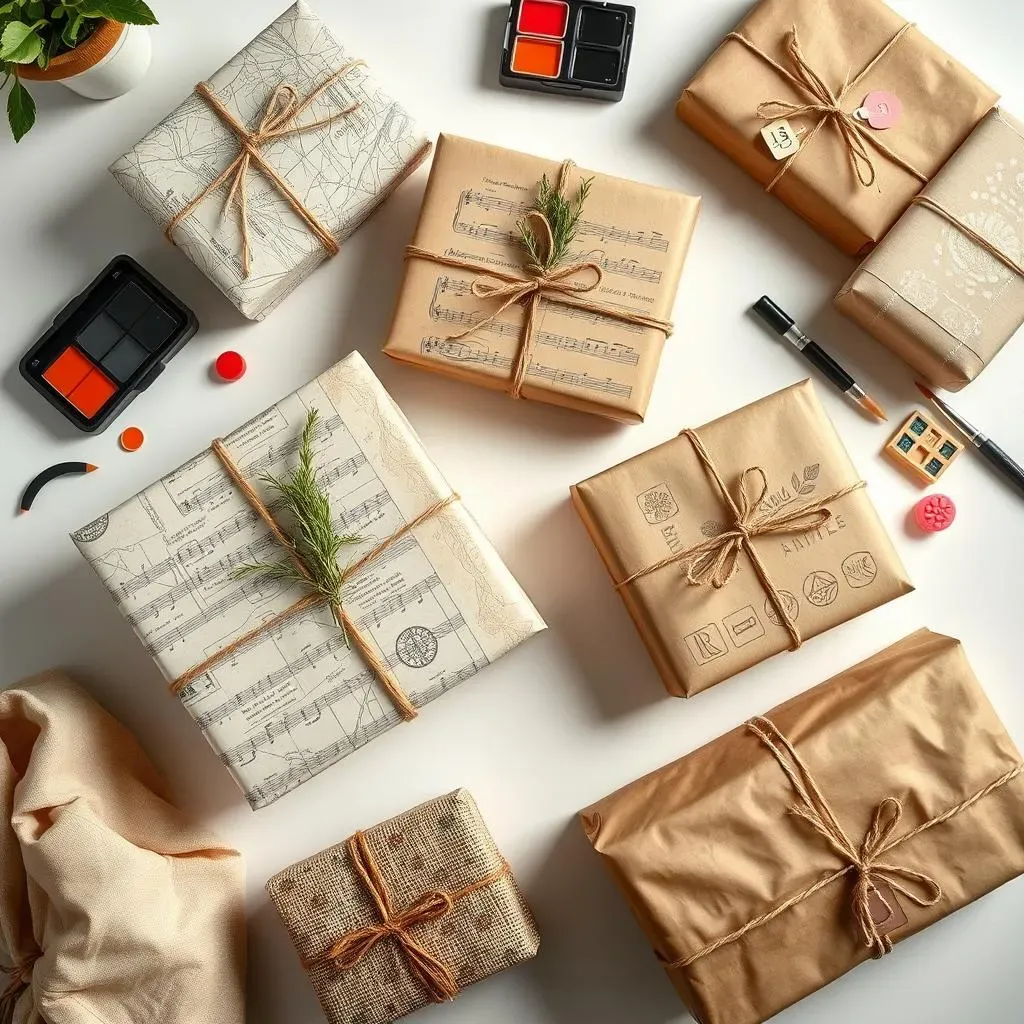
so you're ditching the boring store-bought wrap and you're hyped about DIY. Awesome! But what's next? Let's talk **materials & techniques for unique DIY gift packaging** that will seriously set your presents apart. Think beyond just paper and ribbon. This is where you can really get creative and resourceful. We're talking about transforming everyday items into stunning gift wraps and mastering some simple techniques that will make you look like a gift-wrapping pro, even if you're a total beginner. Ready to dive into the fun part? Let's explore some game-changing materials and techniques!
First up, let’s raid your pantry and craft drawers! Seriously, you probably have a goldmine of potential gift wrap supplies hiding in plain sight. Old newspapers and magazines? Yep, they can look super cool with some twine and a sprig of greenery. Maps? If you’ve got an old atlas lying around, those pages are begging to be turned into unique gift wrap, especially for someone who loves to travel. Sheet music? Perfect for the music lover in your life. And don’t forget about fabric scraps! We touched on this earlier, but it’s worth repeating: fabric is your friend. Lace, burlap, felt, even old t-shirts can be repurposed into amazing gift packaging. The key is to look around your home with fresh eyes and see the potential in things you might normally overlook. It's all about thinking outside the box… or, in this case, outside the wrapping paper roll!
Now, for techniques! Don't worry, we're not talking origami-level сложность (that's Russian for complexity!). Simple is often best. Think about stamping. Grab some plain paper (brown paper works great again!), some ink pads, and some stamps – you can find cool ones online or even carve your own out of potatoes if you're feeling adventurous. Stamping patterns or even just a single image repeatedly can create a custom wrapping paper look in minutes. Another easy technique? Painting! Watercolor paints, acrylics, even just plain old markers can transform plain paper into a work of art. Get abstract with splatters and brushstrokes, or go geometric with stripes and shapes. And if you're not confident in your freehand skills, stencils are your best friend. They make it super easy to create clean, professional-looking designs without any artistic stress. These simple techniques, combined with unexpected materials, are your secret weapon for truly unique DIY gift packaging.
Technique | Description | Materials Needed |
|---|---|---|
Stamping | Applying ink designs using rubber or hand-carved stamps. | Stamps, ink pads, plain paper. |
Painting | Decorating paper with watercolors, acrylics, or markers. | Paints, brushes, plain paper, water (for watercolors). |
Stenciling | Creating patterns using pre-cut stencils and paint or ink. | Stencils, paint or ink, brushes or sponges, plain paper. |
Decoupage | Gluing paper cutouts onto a surface for a layered effect. | Paper cutouts (magazines, newspapers), glue (Mod Podge), plain boxes or paper. |
Final Touches: Making Your DIY Gift Packaging Shine
Final Touches: Making Your DIY Gift Packaging Shine
you've got your awesome DIY gift packaging all wrapped up – literally! But hold on, we're not quite done yet. This is where the magic of the **final touches** comes in. Think of it like adding jewelry to an outfit – it's those little extras that really make everything shine. And when it comes to DIY gift packaging, these final flourishes are what take your present from "nicely wrapped" to "wow, this is amazing!". We're talking about those details that show you went the extra mile, that you put thought and care into every single element. Ready to learn how to make your DIY gift packaging truly unforgettable? Let's dive into some seriously fun finishing touches!
Let's start with ribbons and twine. Seriously, a simple ribbon can transform a plain package in seconds. But don't just tie a basic bow – get creative! Try layering different ribbons, mixing textures like velvet and satin, or using unexpected materials like leather cord or even strips of fabric. And twine? It's not just for rustic looks anymore. Pair it with metallic paper for an industrial-chic vibe, or use colorful baker's twine for a playful touch. Then there are gift tags. Ditch the generic store-bought tags and make your own! Cut them out of cardstock, use luggage tags for a vintage feel, or even repurpose old business cards. Handwrite a personal message, add a little doodle, or stamp on the recipient's initials. It's these small, personal details that make DIY gift packaging so special. Think about it – it's like whispering a little secret message of care right on the outside of the gift.
Final Touch | Description | Impact |
|---|---|---|
Ribbons & Twine | Decorative ties in various materials and styles. | Adds elegance, texture, and visual interest. |
Gift Tags | Handmade or personalized labels with messages. | Personalizes the gift and adds a thoughtful touch. |
Embellishments | Small decorative items like charms, beads, or natural elements. | Enhances the theme and adds unique flair. |
Stickers & Stamps | Custom stickers or stamped designs for branding or decoration. | Adds a professional or custom-made feel. |
And speaking of extra flair, let's talk embellishments! This is where you can really let your creativity shine. Think beyond just bows and ribbons. Got some cute buttons lying around? Glue them on! Dried flowers or herbs? Tuck them under the ribbon for a natural, fragrant touch. Small charms or beads? String them onto twine for a bit of sparkle. Even little paper cutouts or stickers can add personality. Consider the theme of your gift or the recipient's style when choosing embellishments. Are you gifting something cozy? Add a tiny knit heart. Is it for a nature lover? Use a sprig of rosemary or a tiny pinecone. These little details are like the cherry on top of your DIY gift packaging sundae – they're not essential, but they make everything so much better!
Wrapping It Up: Your Gifts, Uniquely Packaged
So, there you have it! Ditching the generic store-bought wrap and diving into DIY gift packaging ideas isn't just about saving a few bucks, it's about adding that extra sprinkle of thoughtfulness and personality to your presents. From kraft paper makeovers to upcycled wonders and those simple yet stunning finishing touches, you've now got a toolkit of creative ways to elevate your gift-giving. Remember, the most memorable gifts are often those that show you've put in the extra effort, and handmade packaging speaks volumes. Go ahead, get crafty, and watch the smiles light up when your beautifully wrapped, one-of-a-kind gifts are unwrapped. Happy gifting!