Table of Contents
Tired of scrambling for a gift bag at the last minute? Or maybe you're just cringing at the thought of spending a fortune on store-bought bags that are destined for the trash anyway? There's a better way! Let's dive into the world of diy gift paper bag creation. It's simpler than you think, seriously budget-friendly, and adds a personal touch that no store-bought bag ever could. Imagine whipping up adorable, custom gift bags using just wrapping paper and a few basic supplies. This isn't just about saving money; it's about adding a sprinkle of your own creativity to every gift you give. Ready to ditch the generic and embrace handmade? This guide will walk you through each step of making your very own diy gift paper bag, from gathering your materials to adding those special finishing touches. Get ready to impress with your crafty skills and thoughtful gift presentation!
Materials You'll Need for Your DIY Gift Paper Bag
Materials You'll Need for Your DIY Gift Paper Bag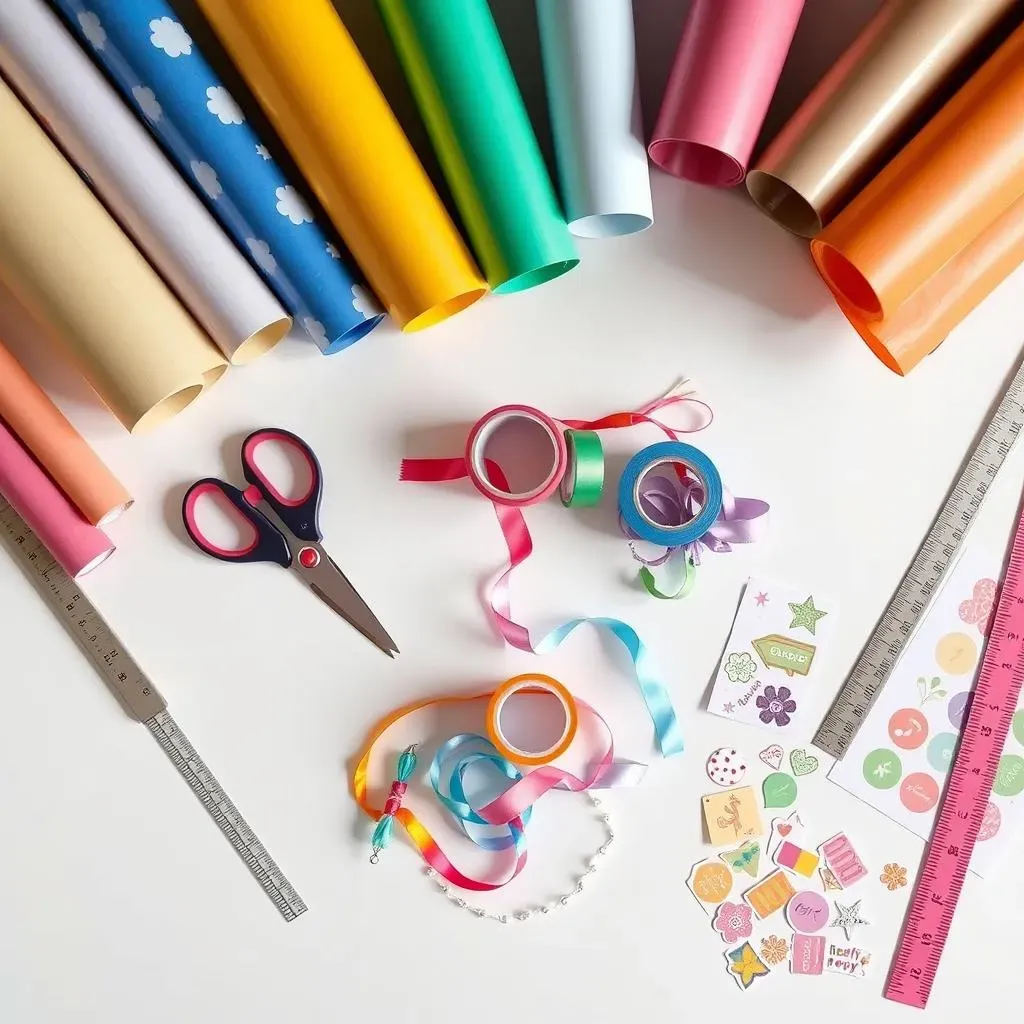
Wrapping Paper Wonders
First things first, let's talk wrapping paper, the soul of your diy gift paper bag! Seriously, this is where the magic happens. You are not stuck with boring brown paper bags, my friend. Think about it: you can raid your gift wrap stash and finally put those leftover rolls to good use. Or, hit up the store for some seriously gorgeous sheets. Double-sided paper? Yes please! Metallic finishes? Absolutely! The thicker paper works best because it gives your bag a bit more structure, but honestly, don't let 'perfect' get in the way of 'amazing'. Even thinner paper can work, especially for smaller, lighter gifts. Just have fun with it and pick papers that scream 'you' or the person you're gifting to.
Tools of the Trade (Super Simple!)
so paper is the star, but every star needs a supporting cast, right? For your diy gift paper bag adventure, the tool kit is refreshingly minimal. You'll need a trusty pair of scissors or a paper cutter. If you're like me and sometimes cut a little wonky (it's charming, I swear!), a paper cutter can be your best friend for straight lines. Next up: adhesive! Tape is the speed demon here – double-sided tape is *chef's kiss* for clean edges, but regular tape works just fine too. Glue sticks are another option, especially if you want a super seamless look, but they take a tad longer to dry. And lastly, a ruler or bone folder. A ruler is great for measuring and scoring folds, and a bone folder? Oh, it's a game changer for crisp, professional-looking folds. But hey, if you don't have one, no sweat, just use the edge of your ruler or even a credit card!
Finishing Touches That Pop
Alright, you've got your paper and your basic tools, now let's talk about taking your diy gift paper bag from 'cute' to 'OMG where did you get that?!' This is where embellishments come in. Think ribbons! Satin, grosgrain, twine, even strips of leftover wrapping paper can become handles or decorative ties. Hole punch is your friend here for making clean holes for ribbon handles. Then there are tags – kraft paper tags, pre-printed ones, or even handmade beauties. Stamps, stickers, washi tape – unleash your inner artist! And don't forget about reinforcing the bag, especially if you're gifting something a bit heavier. Cardstock or even cereal box cardboard cut to size and placed at the bottom of the bag can add that much-needed support. These little extras are what make your handmade gift bags truly special and show that extra bit of thought and care.
Material | Why You Need It | Bonus Tip |
|---|---|---|
Wrapping Paper | The main body of your gift bag, choose fun designs! | Thicker paper is easier to work with, but any will do. |
Scissors/Paper Cutter | For cutting the paper to size. | Paper cutter for straight lines, scissors for everything else. |
Tape/Glue | To stick the bag together. | Double-sided tape for clean edges, glue for a seamless look. |
Ruler/Bone Folder (Optional) | For measuring and crisp folds. | Ruler edge or credit card works in a pinch! |
Ribbon/Handles | To carry the bag and add decoration. | Get creative with different types and colors! |
Tags, Stickers, etc. (Optional) | For extra decoration and personalization. | Unleash your inner artist! |
StepbyStep Guide to Crafting Your Own DIY Gift Paper Bag
StepbyStep Guide to Crafting Your Own DIY Gift Paper Bag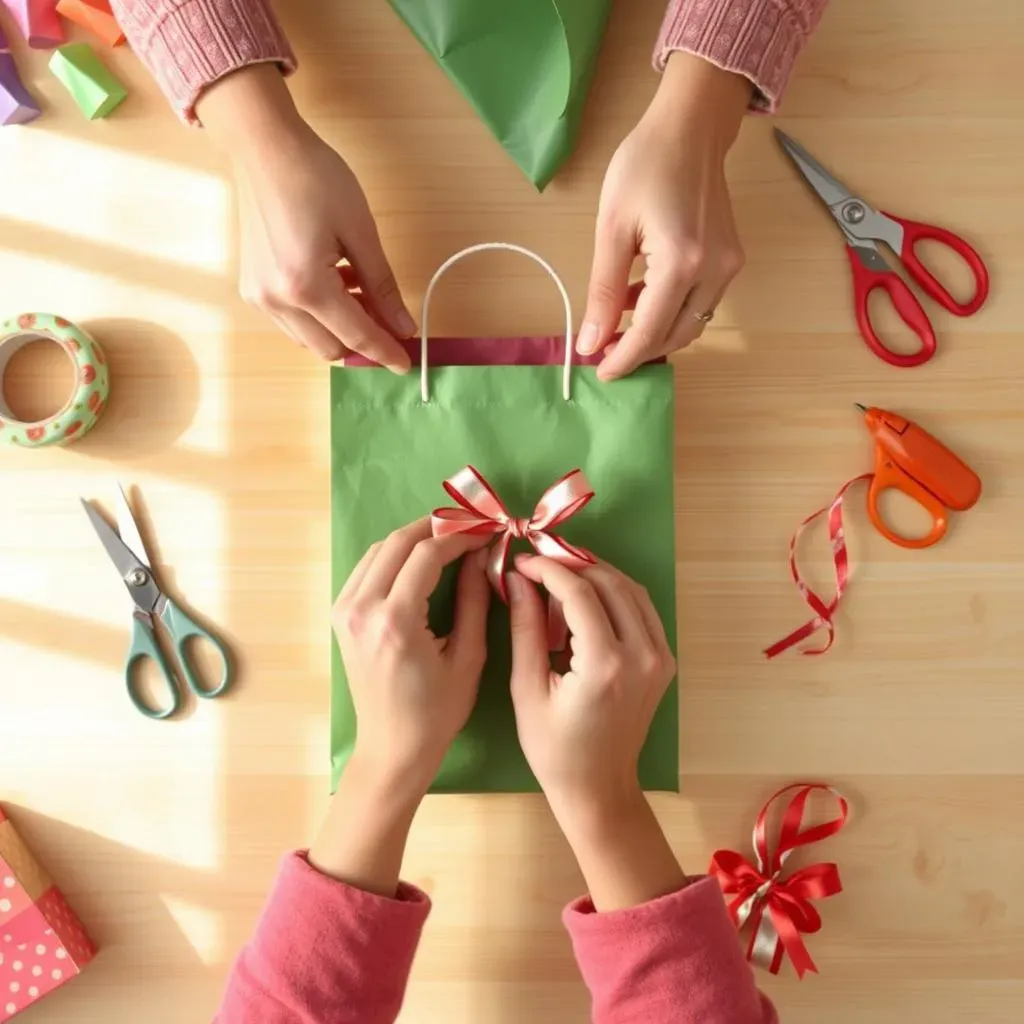
Step 1: Measure and Cut Your Paper
Alright, let's get our hands paper-y! First off for your step-by-step guide to crafting your own DIY gift paper bag, you gotta decide how big you want your bag. Think about the gift you're wrapping. A good starting point is a rectangle of wrapping paper about twice as wide as you want your finished bag to be, and tall enough to reach your desired bag height plus a bit extra for the top fold and bottom. Don't stress too much about exact measurements at first, you'll get the hang of it. For a medium-sized bag, maybe start with something like 12 inches wide and 18 inches tall. Cut out your rectangle nice and clean. Pro tip: If your wrapping paper has a grid on the back, use it! Makes cutting straight lines a breeze.
Step 2: Forming the Basic Bag Shape
Now comes the folding magic in this step-by-step guide to crafting your own DIY gift paper bag. Lay your paper face down. Fold one of the shorter sides over by about an inch and crease it sharply – this will be the top edge of your bag. Then, fold one of the longer sides over by about an inch and a half or two inches, and crease that too. This is going to be one of the side folds. Next, bring the two longer edges of your paper together so they overlap slightly, lining up that side fold you just made with the opposite edge. Adjust until you’re happy with the bag width and then tape or glue along that overlap to create a tube shape. You're starting to see a bag take form!
Step 3: Creating the Bottom and Finishing Up
Almost there in our step-by-step guide to crafting your own DIY gift paper bag journey! With your tube standing upright, flatten the bottom closed. You’ll naturally get two points at the bottom corners. Fold the bottom flap upwards by about 2-3 inches and crease it firmly. Open up those bottom corners now, creating triangle shapes on each side of the bottom flap. Press those triangles flat inwards, towards the center of the bottom flap, and crease them. Fold the top edge of the bottom flap down, overlapping the first fold you made, and tape or glue it all down to secure the bottom. Give the whole bag a good once-over, reinforce any seams that look weak, and you’re practically done! Add handles by punching holes at the top and threading ribbon through, or get even fancier with decorative edges or tags. Boom! Custom diy gift paper bag, made by you!
Step | Action | Image (Mental!) |
|---|---|---|
1. Cut Paper | Rectangle, ~2x width of desired bag. | Flat paper, ready to go. |
2. Top Fold | Fold one short edge ~1 inch over. | Neat folded top edge. |
3. Side Fold | Fold one long edge ~1.5-2 inches over. | Side fold crease is set. |
4. Tube Shape | Overlap long edges, tape/glue. | Tube is forming! |
5. Flatten Bottom | Close the bottom flat. | Two points at the bottom. |
6. Bottom Flap | Fold bottom up ~2-3 inches. | Bottom flap is created. |
7. Corner Triangles | Open corners, press triangles in. | Triangles folded inwards. |
8. Secure Bottom | Fold top of bottom flap down, tape/glue. | Bag bottom is sealed! |
Creative Customization Ideas for Your Handmade Gift Paper Bag
Creative Customization Ideas for Your Handmade Gift Paper Bag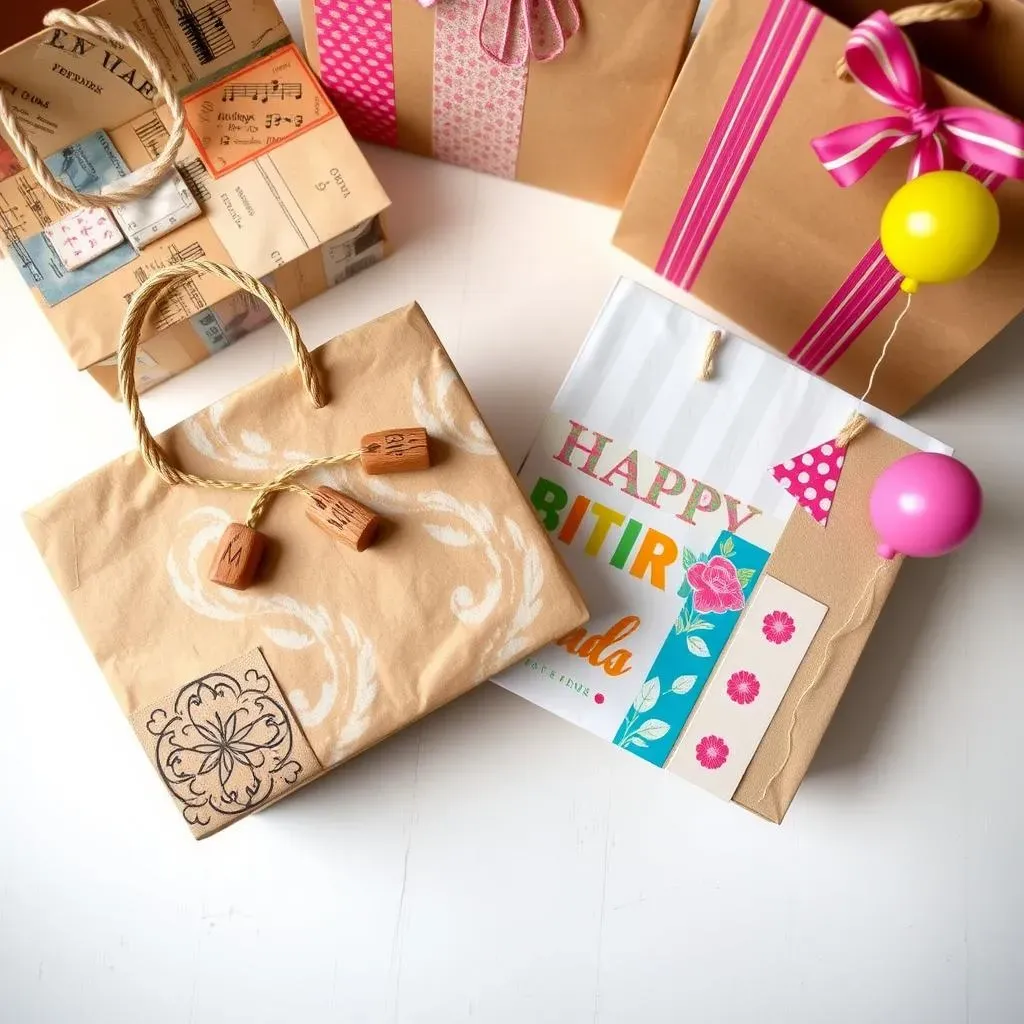
Wrapping Paper Remix
so you've mastered the basic diy gift paper bag, awesome! But hold up, we're just getting to the fun part: making them seriously unique! Let's talk about leveling up your wrapping paper game. Instead of sticking to plain ol' store-bought rolls, think outside the box. Got some cool patterned scrapbook paper? Boom, instant upgrade. Old maps? Vintage vibes for days. Even newspaper or magazine pages can get a funky, recycled look (hello, eco-chic!). Don't be afraid to mix and match papers either. A solid color bag with a patterned accent strip? Yes. A patchwork of different paper scraps? Absolutely! It's your chance to let your personality shine through and create a diy gift paper bag that's as special as the gift inside.
Handle with Flair
Handles. They're not just for carrying, they're a prime spot for customization on your diy gift paper bag! Ribbon is classic, sure, but let’s push it further. Think about using twine for a rustic touch, or strips of fabric for a pop of texture. Leather cord? Fancy! You can braid ribbons together for a thicker, more decorative handle, or even use chain for a super edgy look (maybe not for grandma's birthday, but you get the idea). Get creative with how you attach them too. Instead of just punching holes and threading through, try tying them in knots, or adding little tags or charms to the ends of the handles. It's those little details that take your diy gift paper bag from 'homemade' to 'handmade masterpiece'.
Embellishment Extravaganza
Alright, buckle up, because we are diving headfirst into embellishment-land for your diy gift paper bag! This is where you can really go wild and turn your bag into a mini work of art. Stamps are your secret weapon for adding patterns, messages, or even just cool textures. Ink pads in metallics or bright colors? Yes, please. Stickers! From cute to classy, stickers are the easiest way to inject personality. Washi tape? Obsessed! Use it to create stripes, borders, or even intricate designs. And don't even get me started on tags. Handwritten tags, stamped tags, die-cut tags, tags made from kraft paper, tags made from glitter cardstock... the tag possibilities are endless! Add some twine, a little charm, a sprig of greenery – suddenly your diy gift paper bag is not just a bag, it’s a statement.
Theme It Up!
Want to make your diy gift paper bag extra thoughtful? Theme it! Birthday? Use birthday-themed wrapping paper, add confetti or mini balloons to the handles, and maybe a little age number tag. Holiday gift? Festive paper, ribbons in holiday colors, and maybe a tiny ornament attached. Baby shower? Pastel papers, cute animal stickers, and a tag shaped like a rattle. You get the idea. Thinking about the occasion and tailoring your decorations to fit takes your diy gift paper bag to the next level of awesome. It shows you put in that extra bit of effort, and who doesn't appreciate a gift that's wrapped with as much love as what's inside?
Customization Idea | Materials to Use | Wow Factor |
|---|---|---|
Patterned Paper Accents | Scrapbook paper, patterned cardstock, contrasting wrapping paper | Adds visual interest and pops of color |
Ribbon & Fabric Handles | Satin ribbon, grosgrain ribbon, fabric strips, twine, leather cord | Elevates the handles from functional to decorative |
Stamped Designs | Rubber stamps, ink pads (various colors), clear blocks | Creates unique patterns and personalized messages |
Washi Tape Borders | Washi tape (different patterns and widths) | Adds clean lines and decorative edges easily |
Themed Decorations | Holiday-themed stickers, birthday confetti, baby shower charms, etc. | Makes the bag occasion-specific and extra thoughtful |
Why Choose DIY Gift Paper Bags: Benefits and Occasions
Why Choose DIY Gift Paper Bags: Benefits and Occasions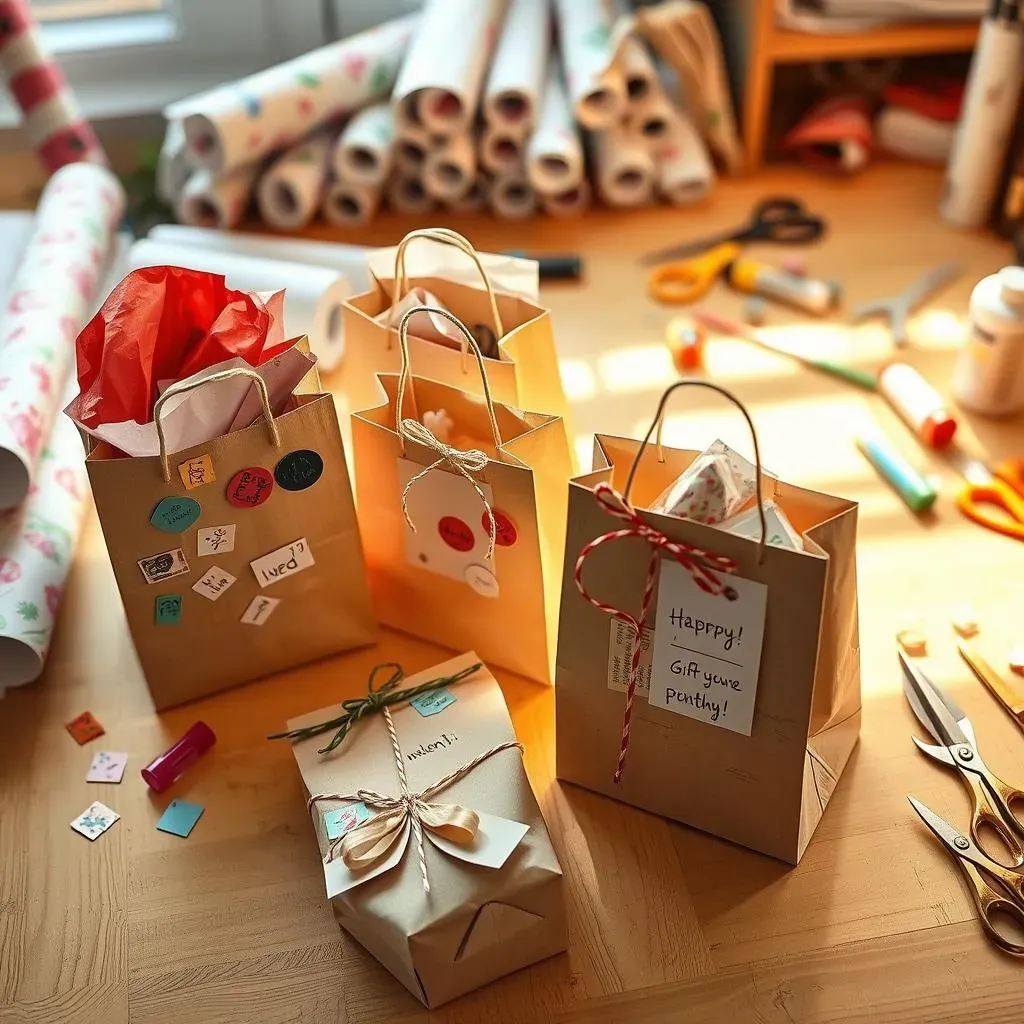
Budget-Friendly & Eco-Conscious Gifting
Let's be real, store-bought gift bags can be ridiculously expensive, especially when you need a bunch of them. Why choose DIY gift paper bags instead? Well, for starters, it's a total wallet-saver! Think about it – you're likely already buying wrapping paper for gifts anyway, so you're essentially getting two uses out of one purchase. Plus, you can raid your stash of leftover wrapping paper scraps, old maps, even newspaper – talk about budget-friendly and eco-conscious! Making your own gift bags is a fantastic way to cut down on waste and be a bit kinder to the planet, all while saving yourself some cash for, you know, actual gifts!
Personal Touch for Every Occasion
Beyond the budget and eco-perks, why choose DIY gift paper bags really boils down to personalization. A generic store-bought bag? Meh. A handmade bag that you've customized to perfectly match the gift and the recipient? That's next level thoughtfulness. Imagine a birthday gift in a bag made with paper featuring their favorite colors, or a holiday present in a bag adorned with festive stamps and ribbons. It’s that extra touch that screams "I put thought into this!" DIY gift bags aren't just about wrapping a present; they're about adding an extra layer of love and care to your gift-giving, no matter the occasion.
Benefit | Why It Matters | Occasion Idea |
|---|---|---|
Cost-Effective | Saves money compared to store-bought bags. | Large gatherings, kids' birthday parties. |
Eco-Conscious | Reduces waste, uses recycled materials. | Earth Day gifts, environmentally-minded friends. |
Personalized | Adds a unique, thoughtful touch. | Birthdays, holidays, thank you gifts. |
Creative Outlet | Fun and engaging DIY activity. | Craft nights, family activities. |
Versatile | Suitable for any gift-giving occasion. | All occasions! From casual to formal. |
Wrap It Up: Your DIY Gift Paper Bag Journey
So, there you have it! Creating your own diy gift paper bag is not only a breeze but also a fantastic way to personalize your gifts and be kinder to your wallet. From birthdays to holidays, or just because, these handmade bags add that extra special something. Why settle for ordinary when you can easily craft something unique and heartfelt? Grab some wrapping paper and get started – your perfectly packaged gifts await!