Table of Contents
Tired of the same old gift wrap and predictable presents? Does the thought of another generic tie or scented candle make you want to hide under the bed? Let's be honest, finding a truly unique way to give a gift can feel like a quest for a mythical creature. You want something that says "I put thought into this," not "I grabbed the first thing I saw." This is where the magic, and maybe a little bit of controlled chaos, of a **diy gift vending machine** comes in.
Why Build a DIY Gift Vending Machine Anyway?
Why Build a DIY Gift Vending Machine Anyway?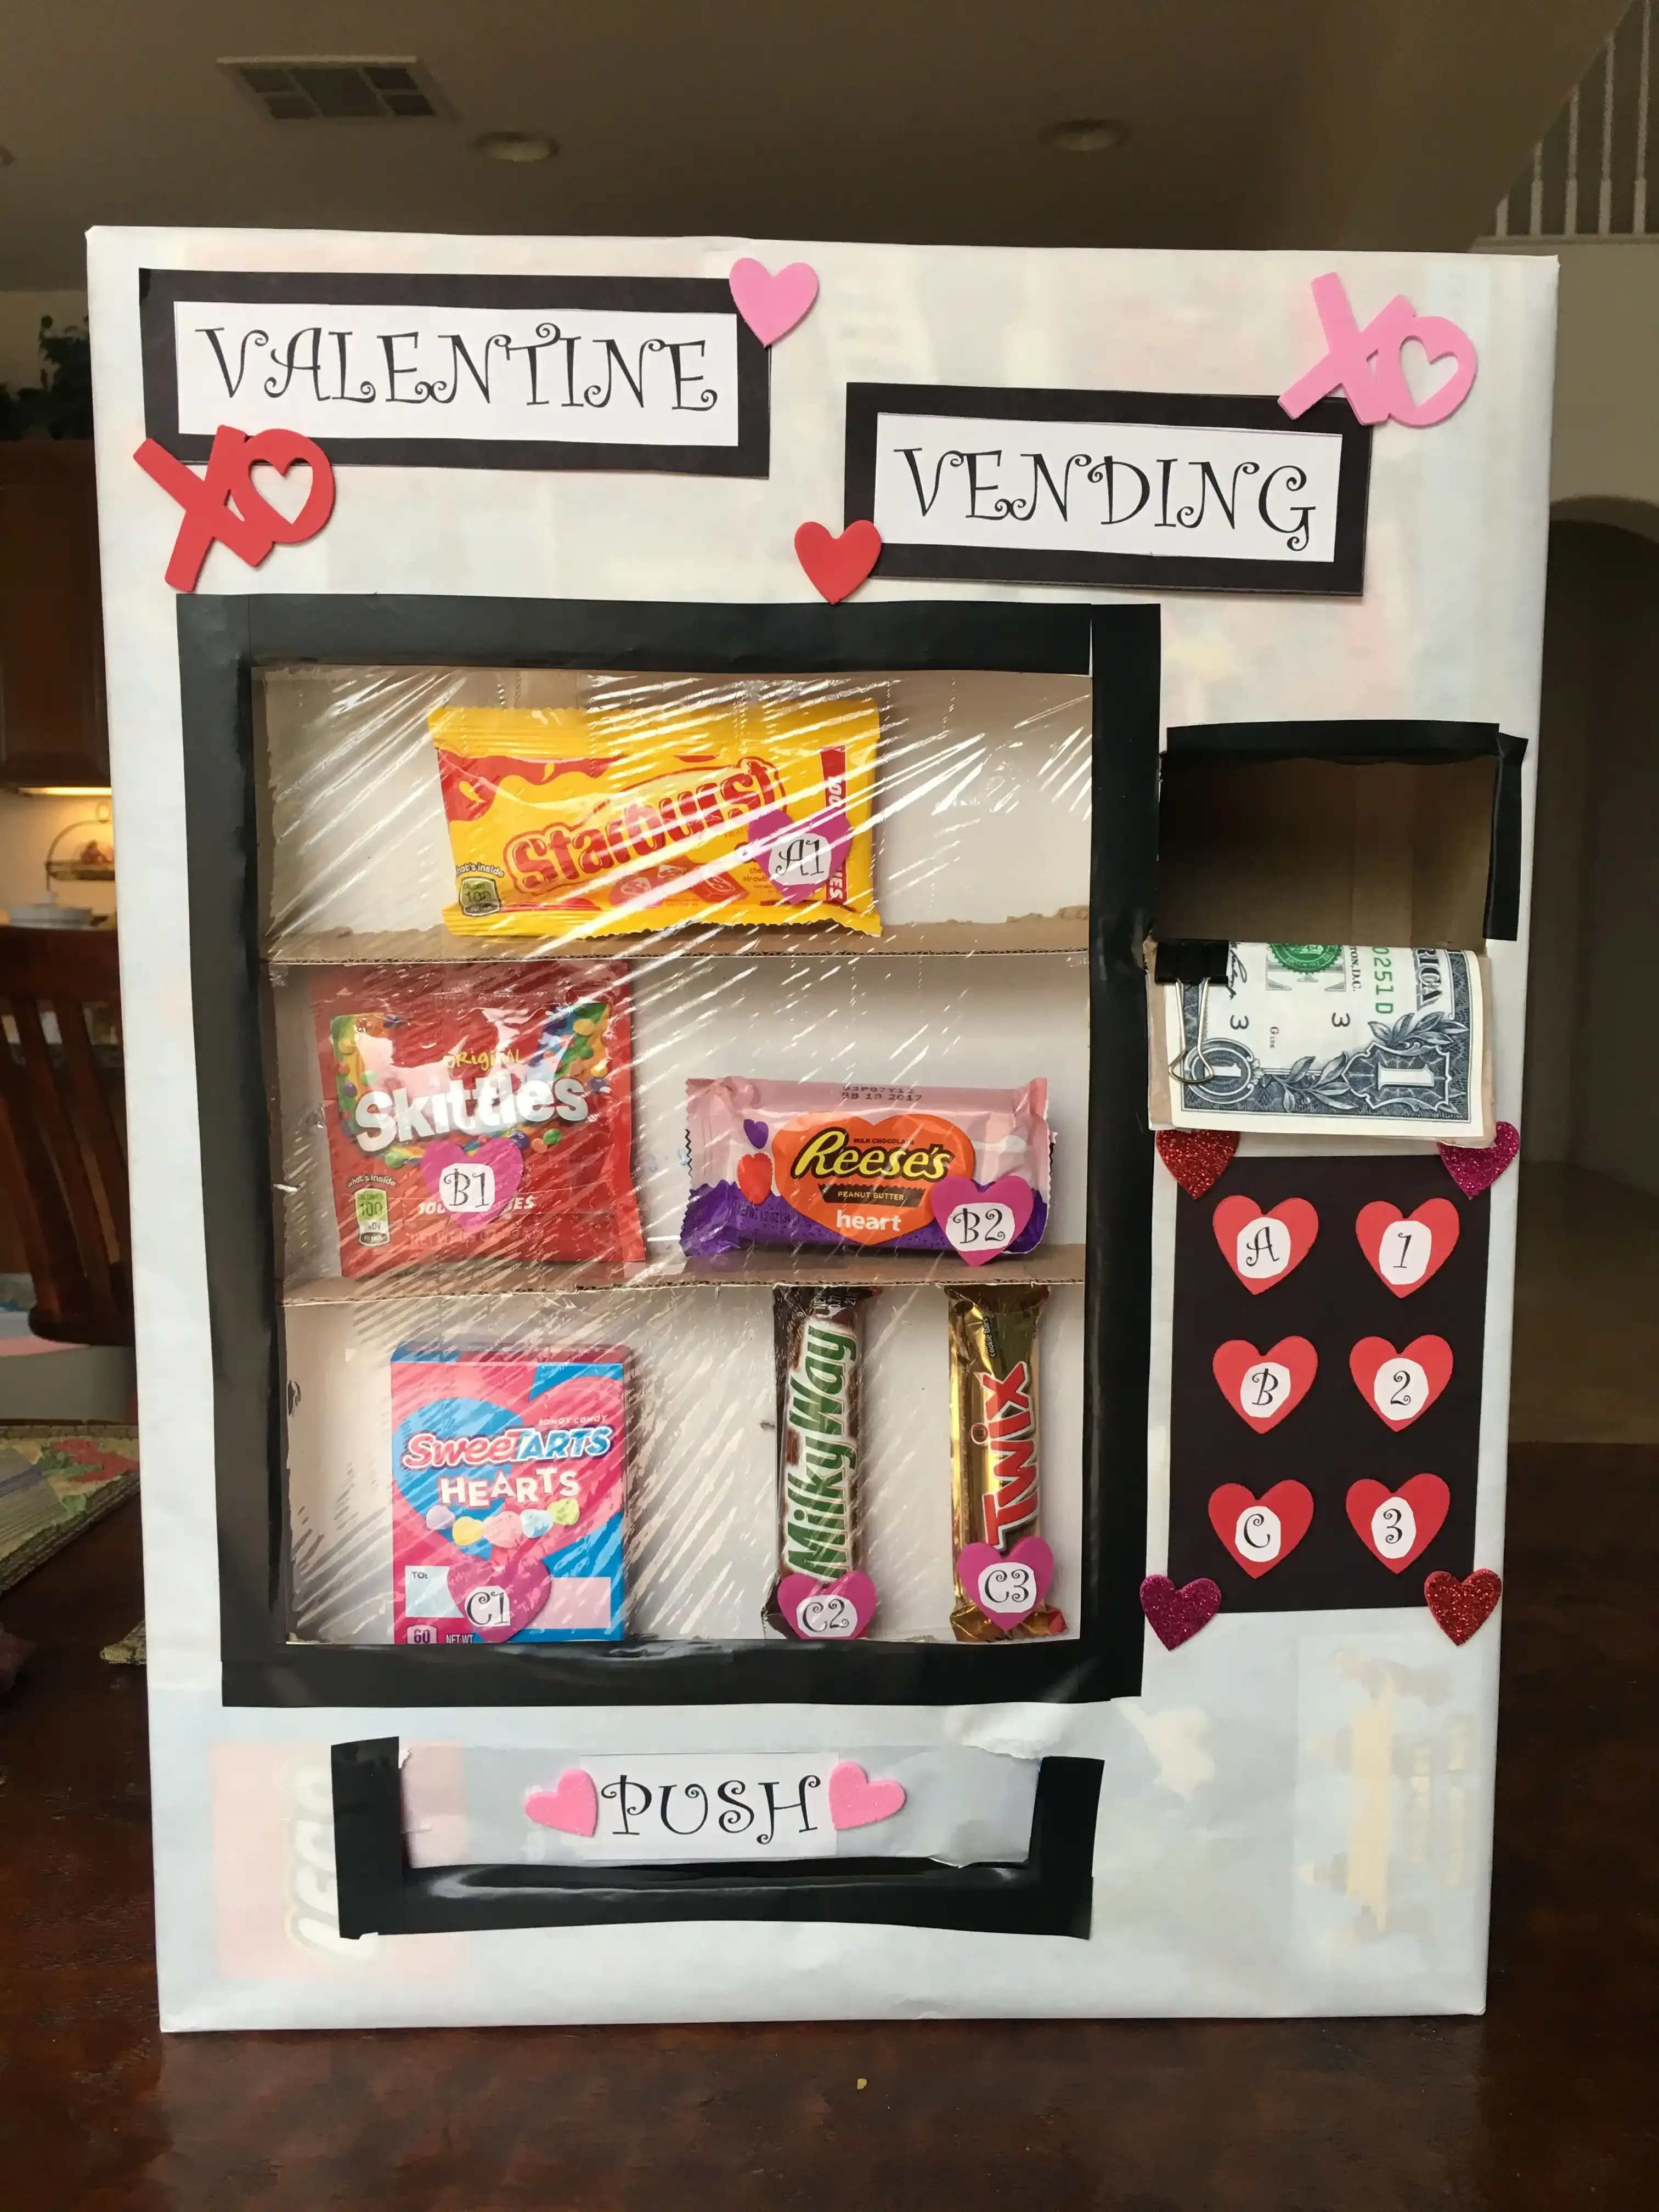
So, you're probably thinking, "A DIY gift vending machine? Isn't that a bit... extra?" And maybe, just maybe, it is. But think about the last time you got a gift that genuinely surprised and delighted you. It wasn't just the item itself, was it? It was the presentation, the thought, the sheer unexpectedness of it all. That's exactly the point of building a **Why Build a DIY Gift Vending Machine Anyway?** It transforms a simple exchange into an event. It's not just about giving a present; it's about creating a moment, a bit of fun, a story that people will actually remember and talk about. Plus, let's be real, wrapping presents can be a total drag. This is way more exciting than wrestling with tape and paper.
Planning the Guts of Your DIY Gift Vending Machine
Planning the Guts of Your DIY Gift Vending Machine
Figuring Out How It Actually Works
Alright, so you're sold on the idea of a DIY gift vending machine. Awesome. Now comes the slightly less glamorous, but totally crucial, part: figuring out what makes this thing tick. We're talking about the internal workings, the mechanics, the "guts" if you will. How is that gift actually going to get from inside the box to the eager hands outside? Are you going old-school gravity drop, like those classic candy machines where you turn a knob and a treat clatters down? Or are you thinking something slightly more sophisticated, maybe a simple lever system, or even a slide? This is where you need to picture the action happening inside your machine. Keep it simple for your first go. A basic release mechanism is key to avoiding frustration later.
Choosing Your Core Structure and Release Method
Once you have a vague idea of the gift delivery method, you need to pick the main container for your DIY gift vending machine. Cardboard boxes are your best friend here, especially sturdy ones. Appliance boxes, shipping boxes, whatever you can get your hands on. You'll need to reinforce it, maybe with more cardboard layers or even some thin wood scraps if you're feeling ambitious. Then, think about the release mechanism's home. If it's a gravity drop, you need a ramp or chute. If it's a push or pull system, you need guides or tracks. Don't overcomplicate it. A simple cardboard flap that opens, a slide made from poster board, or a small trapdoor can work wonders. The structure needs to support the gifts and guide them reliably.
So, what's your initial gut feeling on how the gift gets out?
- Gravity Drop (Simple ramp)
- Lever Push (Something pushes the gift forward)
- Slide/Drawer (Gift sits on something that slides out)
- Trapdoor Release (Gift drops from a compartment)
Gathering the Goods: What You Need for Your DIY Gift Vending Machine
Gathering the Goods: What You Need for Your DIY Gift Vending Machine
Round Up Your Building Blocks
Alright, time to hit the craft store, the hardware aisle, or honestly, just raid your recycling bin. Building a DIY gift vending machine starts with the basics. You're going to need cardboard. Lots of cardboard. Think sturdy boxes – appliance boxes are gold, but even regular shipping boxes will do if you layer them up. Grab a utility knife or a good box cutter, some heavy-duty tape (packing tape is your friend, duct tape is your superhero), and a gallon of white glue or craft glue. Hot glue can be helpful for quick fixes, but the white stuff gives a stronger bond for the main structure. Don't forget rulers, pencils, and maybe a cutting mat if you want to keep your table intact. These are the bones of your operation.
Adding the Bells and Whistles
Once the structure of your DIY gift vending machine is taking shape, you need the stuff that makes it look and act like, well, a vending machine. Paint, markers, stickers, wrapping paper – whatever you want to use to make it look less like a pile of cardboard and more like a magical gift dispensary. You'll also need a way to create that window where you see the prizes. Clear plastic sheets from old packaging or even some clear report covers work perfectly. For the mechanism, think simple: a wooden dowel for a lever, a plastic cup or small box to hold the gift before it drops, maybe some string or rubber bands depending on your release design. Don't forget something for the "coin slot" – a simple slit in the cardboard is fine, or you can get fancy with a small box attached.
So, before you dive in, here's a quick checklist of the essentials:
- Sturdy Cardboard Boxes
- Utility Knife/Box Cutter
- Heavy-Duty Packing Tape
- White Glue or Craft Glue
- Rulers and Pencils
- Paint, Markers, or Decorating Supplies
- Clear Plastic (for the window)
- Materials for Your Mechanism (dowel, string, small containers)
- Something for a "Coin Slot"
Assembling the Beast: StepbyStep DIY Gift Vending Machine Construction
Assembling the Beast: StepbyStep DIY Gift Vending Machine Construction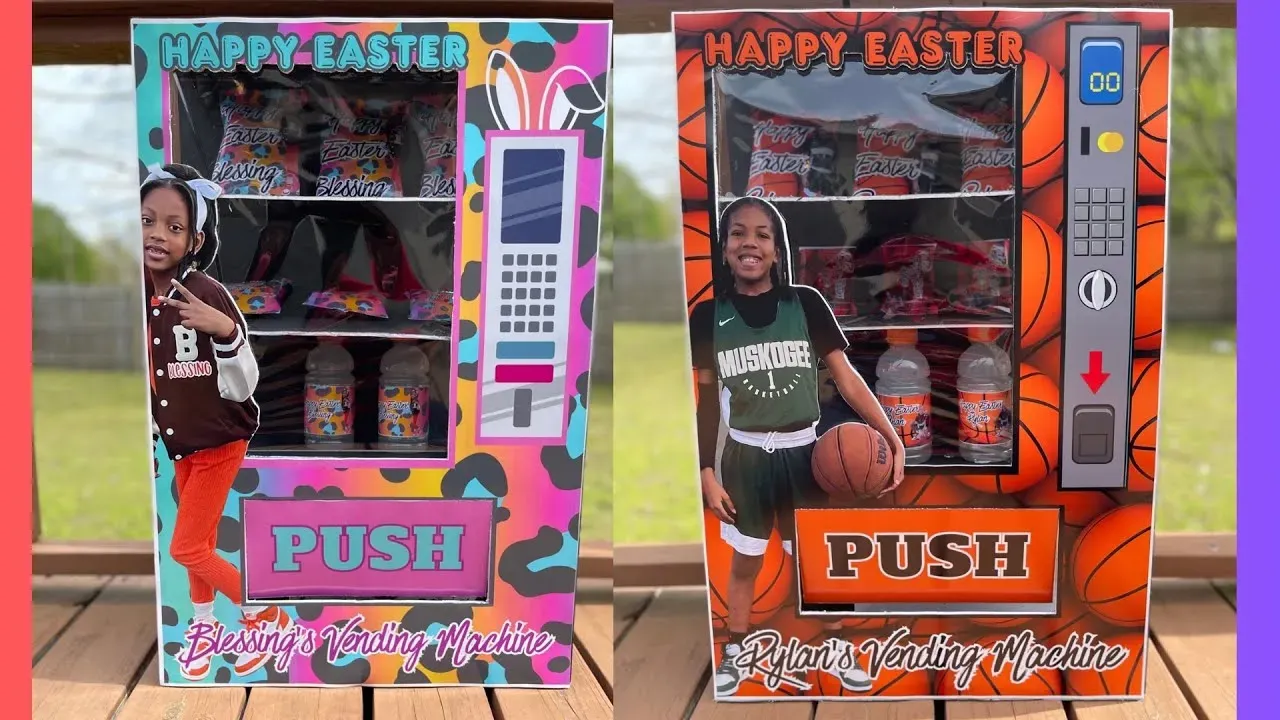
Cutting and Taping the Main Box
Alright, you've got your pile of cardboard and your vision. Time to start cutting. This is where your utility knife earns its keep, so be careful. First, decide on the overall size of your **diy gift vending machine**. Mark out your front panel, sides, top, and back on your chosen sturdy box or boxes. Cut out the main shape. Think of it like building a simple box house first. Once your pieces are cut, start taping them together. Use that heavy-duty packing tape liberally on all the seams, inside and out. You want this thing to hold together, not collapse like a sad soufflé the moment you put a gift in it. Reinforce corners especially – they take a lot of stress.
Building the Internal Delivery System
With your main box structure standing (or at least taped into shape), it's time to tackle the guts – the delivery system for your **diy gift vending machine**. If you're going with a gravity drop, cut and fold cardboard into a ramp or chute. Test the angle with a few sample gifts to make sure they slide down smoothly and don't get stuck halfway. Tape this chute securely inside the main box, making sure it lines up with where your gift will exit. If you're doing a lever or slide, build that mechanism separately – a small platform on a stick, a sliding tray – and then figure out how to mount it inside so it functions properly when activated from the outside. This part requires a bit of trial and error, so don't get discouraged if your first attempt jams.
Think about the path your gift will take:
- Where does the gift sit before release?
- What action triggers the release?
- How does the gift travel to the exit?
- Does it need a clear path or a guided chute?
Adding the Front Panel, Window, and Details
Now for the face of your **diy gift vending machine**. Cut out the opening for your display window on the front panel. This is where the magic happens – people need to see what they're winning, right? Cut a piece of your clear plastic slightly larger than the opening and glue or tape it securely on the *inside* of the front panel. This keeps sticky fingers out and gifts visible. Next, cut your coin slot. Keep it simple – a slit is fine. You can add a small box behind it on the inside to catch the "coins" (which can be anything from actual coins to tokens to bottle caps). Finally, attach your decorated front panel to the main box structure. This is where all your previous work comes together, giving your cardboard creation its vending machine identity.
Stocking and Styling Your Finished DIY Gift Vending Machine
Stocking and Styling Your Finished DIY Gift Vending Machine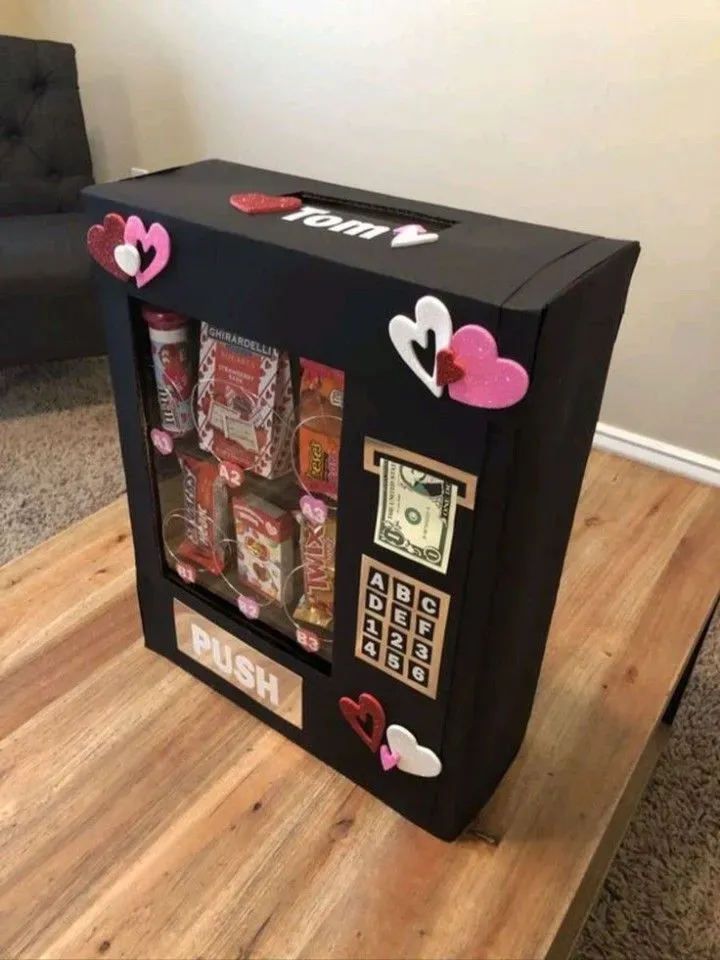
Filling and Finishing Your Creation
Alright, the structure stands, the mechanism (hopefully) works, and it's starting to look less like a recycling bin explosion and more like a proper contraption. Now comes the fun part: filling your **DIY gift vending machine** and making it look like a million bucks (or at least ten bucks and some change). What you put inside is key. Think small, fun, and maybe a little silly. Miniatures, quirky keychains, homemade cookies wrapped tight, tiny toys, gift cards for a coffee – stuff that fits the machine's scale and your audience. Don't cram it so full the mechanism jams again. Leave some breathing room. As for the outside, this is your chance to go wild. Paint it bright colors, cover it in stickers, draw cheesy graphics, add labels for what each "prize" is (or keep it a mystery!). Make it look inviting, exciting, something that makes people want to feed it a coin and see what pops out. This is where personality turns cardboard into magic.
Your DIY Vending Adventure is Complete
So there you have it. You've wrestled with cardboard (or perhaps something sturdier), puzzled over mechanisms, and probably questioned your sanity at least once. But now, standing before you, is your very own DIY gift vending machine. It might not dispense perfectly chilled sodas, but it dispenses something far better: a moment of unexpected fun and a tangible demonstration that you went the extra mile. Forget the generic gift bag; this is a conversation starter, a memory maker, and proof that sometimes, the best presents are the ones you build yourself. Now, the only real challenge is deciding who gets to try it first.