Table of Contents
Struggling to find that perfect, heartfelt gift? In a world of fleeting trends and generic presents, wouldn't it be amazing to give something truly unique and personal? Enter the photo box DIY gift – a creative way to turn cherished memories into a tangible treasure. This isn't just any box; it's an explosion box, unfolding to reveal layers of photos and heartfelt messages. Imagine the look on their face as they open a seemingly simple box only to have it bloom into a cascade of memories. Ready to create a photo box DIY gift that will truly wow? This guide will walk you through easy steps to craft your own explosion box, packed with personalization tips and decoration ideas, showing you why this handmade present is the ultimate expression of care.
Craft a Heartfelt Photo Box DIY Gift
Craft a Heartfelt Photo Box DIY Gift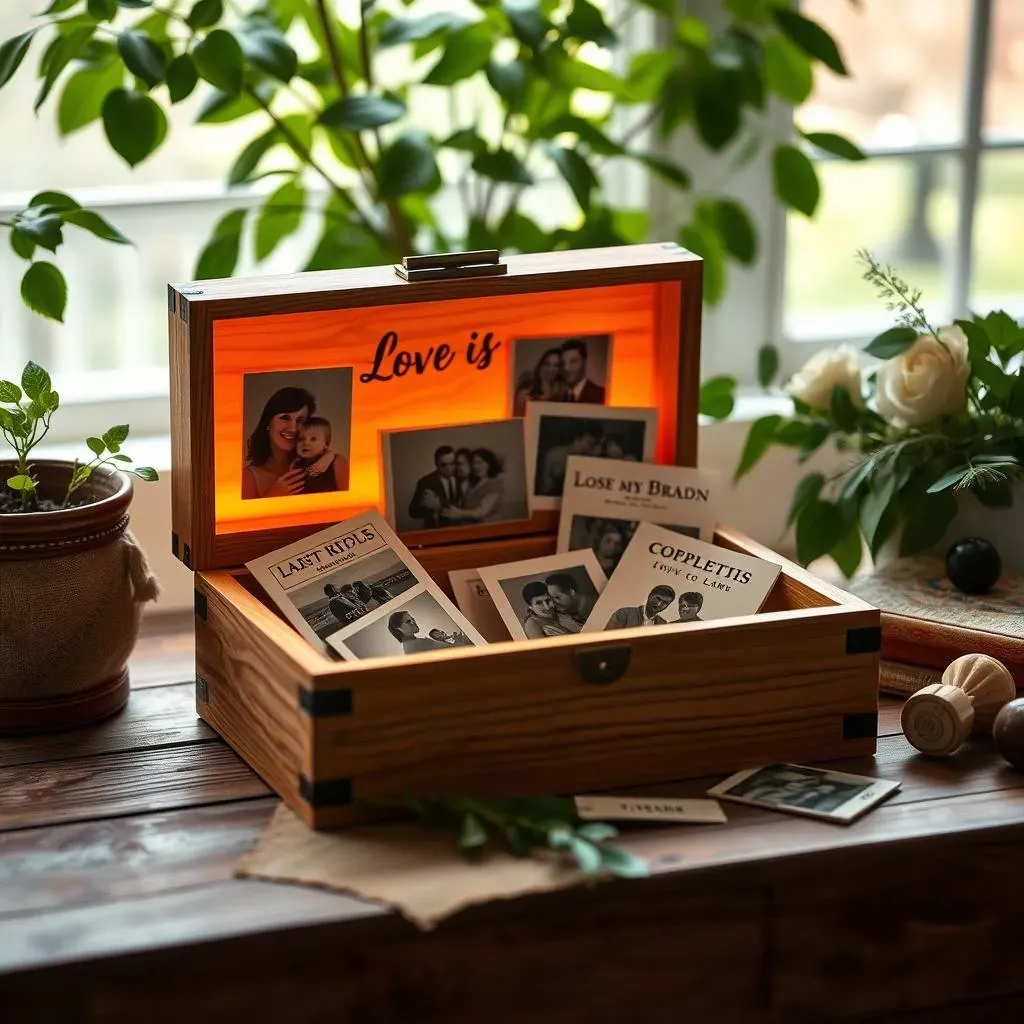
Let’s talk about gifts that actually mean something, you know? Forget the generic store-bought stuff. If you want to really touch someone's heart, you gotta go handmade. And trust me, nothing screams "I care" quite like acraft a heartfelt photo box DIY gift. Seriously, think about it – you're not just giving an object; you’re handing over a box brimming with memories, effort, and a whole lot of love. It’s like saying, "Hey, remember all these awesome times? I do, and you're awesome too!"
Easy Steps to Make Your Own Explosion Photo Box Gift
Easy Steps to Make Your Own Explosion Photo Box Gift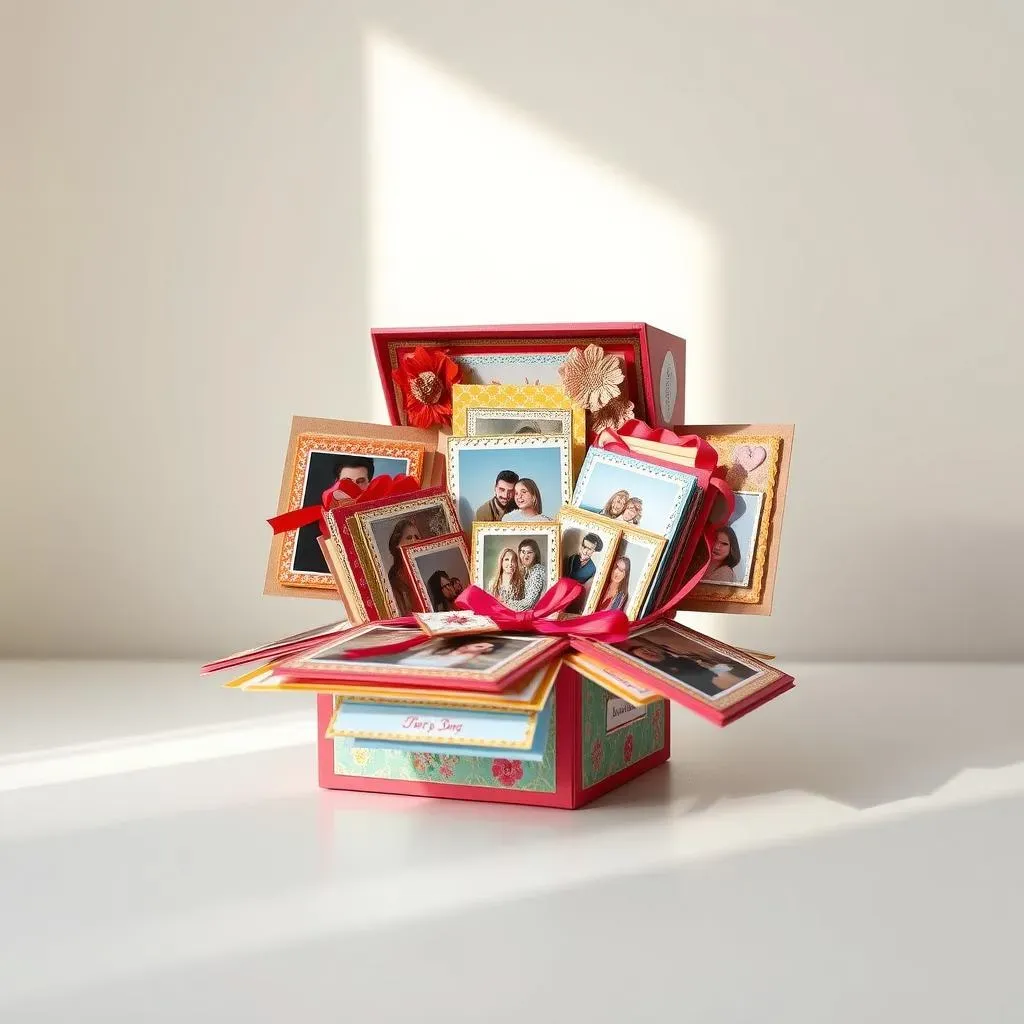
Gather Your Goodies for a DIY Photo Box Gift
Alright, so you're hyped to make your own explosion photo box gift? Awesome choice! First things first, let's gather our arsenal. Think of it like prepping your station before cooking up a masterpiece, but instead of ingredients, we're grabbing craft supplies. You’ll need some sturdy cardstock – colorful ones make it pop, but classic white or kraft paper works wonders too. Grab a paper trimmer or scissors for clean cuts, adhesive – double-sided tape or glue dots are your best friends here – and a scoring board or ruler and bone folder to make crisp folds. Oh, and don’t forget the stars of the show: your photos! Print out a bunch of your favorite memories, and maybe gather some fun embellishments like stickers, patterned paper scraps, ribbons, or markers to jazz things up. Basically, raid your craft stash and get ready to create!
Crafting the Exploding Base: Layer by Layer
Now for the fun part – building the actual explosion box! It might sound intimidating, but trust me, it's easier than perfecting a pancake flip. Start by cutting squares of cardstock for each layer of your box. Typically, you'll want to make each layer slightly smaller than the last to create that cool cascading effect when it opens. Think nesting dolls, but made of memories. A common size progression could be 12x12 inches for the base, then 10.5x10.5 inches for the next, and so on, decreasing by about 1.5 inches each layer. For each square, score lines to divide it into nine equal smaller squares. Imagine a tic-tac-toe board. You’ll score along these lines, then fold along the score lines to create the box sides. Leave the very center square as the base, and fold the four squares around it upwards to form the walls of your layer. Repeat this for each layer, making sure they get progressively smaller.
Materials for Your DIY Photo Box Gift | Why You Need It |
|---|---|
Cardstock (various colors/patterns) | Forms the structure of the box and layers |
Photos | The heart of the gift! Memories to showcase |
Paper Trimmer or Scissors | For precise cutting of cardstock and photos |
Adhesive (double-sided tape, glue dots) | To securely assemble the box layers and decorations |
Scoring Board or Ruler & Bone Folder | For creating clean, crisp folds |
Embellishments (stickers, ribbons, markers) | To personalize and decorate your photo box gift |
Top it Off: Creating the Perfect Lid
Almost there! No explosion box is complete without a lid to keep all those memories contained until the big reveal. Making the lid is surprisingly simple. Cut another piece of cardstock, slightly larger than your largest box layer – about 1/2 inch bigger on each side should do the trick. Score around all four sides, creating a border that will fold down to form the lid's sides. The depth of this border will depend on the height of your box layers, usually around 1 to 1.5 inches is good. Cut small slits at each corner of the scored border, then fold and glue these flaps inwards to create neat corners for your lid. Decorate the lid to give a sneak peek of the awesomeness inside, or keep it a mystery until they lift it off. Boom! You’ve got a lid, and your explosion photo box gift is really starting to take shape.
Personalize Your DIY Photo Box Gift: Theme and Decoration Ideas
Personalize Your DIY Photo Box Gift: Theme and Decoration Ideas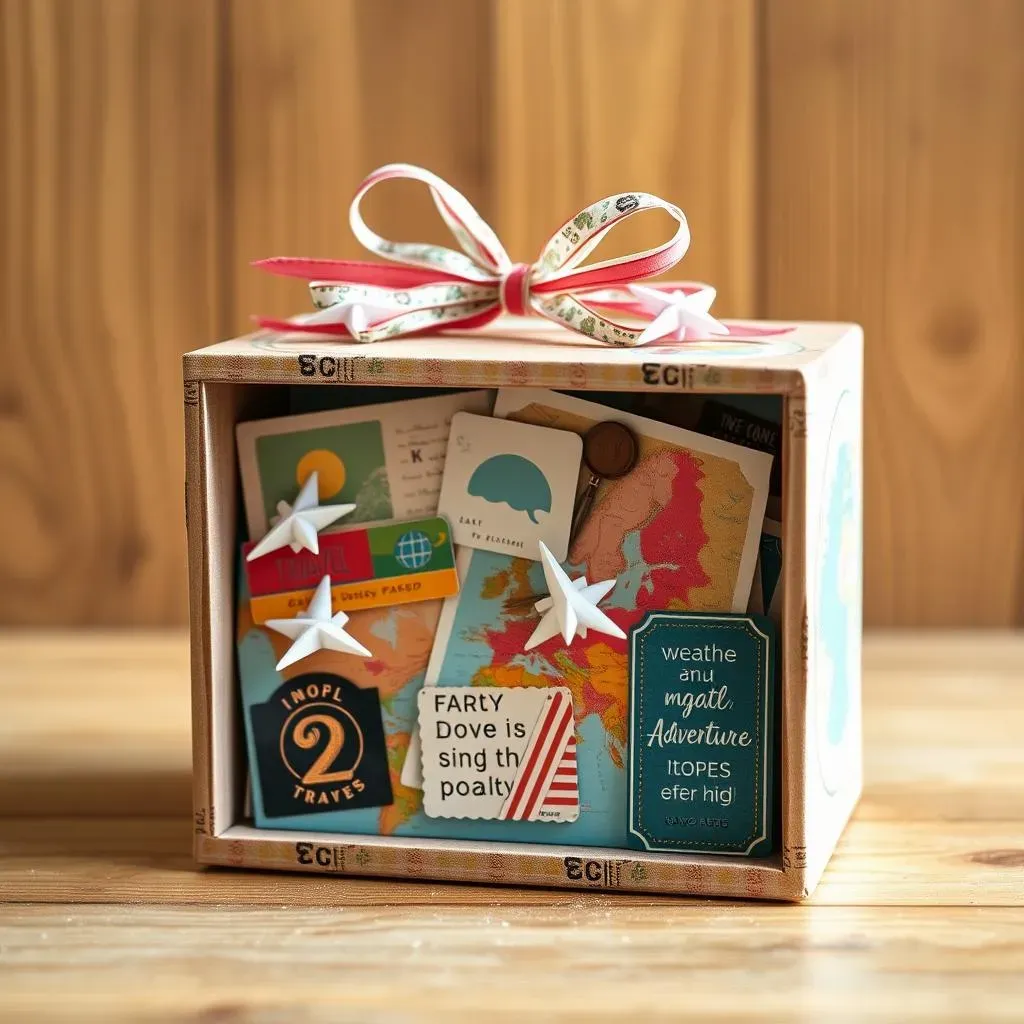
Theme It Up: Occasion-Based Ideas
now your explosion box is built, it's time to make it sing! Think about who you're giving thispersonalized DIY photo box giftto and what the occasion is. This is where the fun really kicks in. Is it a birthday? Go wild with birthday-themed scrapbook paper, confetti, and maybe little paper candles. Anniversary? Think romantic – soft colors, hearts, maybe even recreate elements from your wedding invites or date nights. Holiday gift? Christmas colors, mini ornaments, or spooky Halloween vibes – the possibilities are endless! Having a theme not only makes decorating easier but also adds a thoughtful layer that shows you put extra effort into making it just right.
For instance, I once made a travel-themed explosion box for my friend who was going on a backpacking trip. I used maps as paper layers, added little paper airplanes, and included quotes about adventure. She totally loved it, and it became a keepsake from her travels as well as a pre-trip excitement booster. Themes are your secret weapon to seriously level up yourpersonalized DIY photo box giftgame.
Deck it Out: Embellishments and Interactive Fun
Let's get into the nitty-gritty of decorations! Embellishments are your besties here. Stickers, washi tape, ribbons, glitter (if you're brave!), paper cutouts – anything goes. Don't be afraid to mix and match textures and colors to make it visually exciting. Think about adding interactive elements too. Little folded mini-books tucked into pockets, waterfall photo strips that cascade down when pulled, or even tiny envelopes with handwritten notes inside. These surprises make exploring thepersonalized DIY photo box gifteven more engaging and fun. It’s like an adventure unfolding with every layer they discover.
Remember those brag books our moms used to carry around? Think of your explosion box as the upgraded, cooler, 3D version of that! And hey, if you’re not super crafty, don’t sweat it. Even simple decorations, when thoughtfully placed, can make a huge impact. The key is to let your personality and the recipient's shine through in your choices.
- Theme Stickers: Match stickers to your chosen theme (birthday, travel, etc.).
- Washi Tape: Use decorative tape to edge photos or add colorful borders.
- Ribbons & Twine: Tie layers together or add bows for extra flair.
- Paper Cutouts: Create shapes or letters to spell out names or messages.
- Mini Envelopes: Tuck in tiny notes or fortunes for hidden surprises.
- Waterfall Strips: Create cascading photo displays for interactive fun.
Heartfelt Touches: Personal Messages and Memories
Beyond the photos and fancy decorations, the real magic of apersonalized DIY photo box giftis in the personal touches. Handwritten notes are gold. Seriously, in a digital world, a handwritten message carries so much weight. Jot down inside jokes, favorite memories you share, or just heartfelt messages for each photo or layer. Don’t underestimate the power of words to amplify the emotional impact of your gift. Think about adding little mementos too – ticket stubs from a concert you went to together, a dried flower from a special occasion, or anything that sparks a shared memory. These details transform your box from just a craft project into a deeply meaningful keepsake.
I always include a handwritten letter in my explosion boxes. It’s a chance to really express what the person means to me, beyond just the photos. Plus, years later, rereading those notes becomes a whole new wave of nostalgia. It's these personal elements that make apersonalized DIY photo box giftso much more impactful than anything you could buy in a store. It's a piece of your heart, crafted with your hands.
Why a Photo Box is the Perfect DIY Gift
Why a Photo Box is the Perfect DIY Gift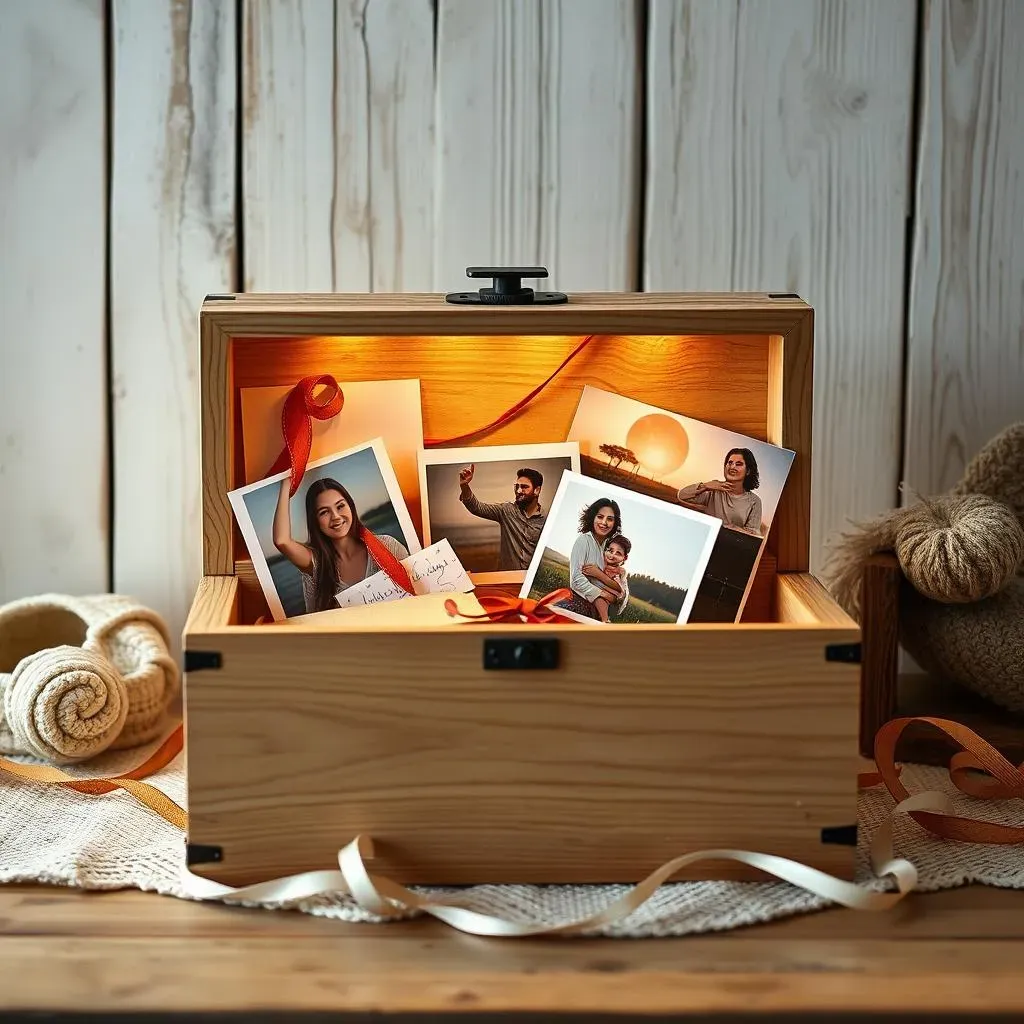
Handmade Heartfelt: The Personal Touch
Seriously, in a sea of mass-produced stuff, aphoto box DIY giftstands out like a beacon of thoughtfulness. Think about the last generic gift you got – nice, maybe, but did it really scream "this person *gets* me?" Probably not. That's the magic of handmade. When you pour your time and effort into creating something, especially aphoto box DIY giftbrimming with shared memories, it's like sending a message that's way louder than words. It says, "I didn't just grab something off the shelf; I made this *for you*." And in a world where everything feels so disposable, that personal touch is priceless.
Plus, let's be real, crafting is therapeutic! Putting together aphoto box DIY giftisn't just about the end product; it's about the process. It's a chance to get a little crafty, de-stress, and channel some creative energy. And you know what? That good vibe totally transfers into the gift itself. It's like you're infusing it with positive energy, making it even more special for the person receiving it.
Memories Made Tangible: Beyond the Digital
In our digital-everything world, photos often live on our phones, lost in the endless scroll. Aphoto box DIY giftchanges that. It takes those precious digital memories and gives them a real, tangible form. There's something incredibly special about holding a physical photo, flipping through memories you can actually touch. It’s way more impactful than just scrolling through a screen, trust me. Aphoto box DIY giftbecomes a keepsake, a treasure chest of moments that can be revisited and cherished again and again, not just another file on a hard drive.
Think of it as creating a time capsule of your relationship or a specific period in someone's life. Each layer unfolded, each photo revealed, is a little journey down memory lane. And let’s face it, in a few years, who knows where those digital photos will be? Lost in the cloud? On a forgotten hard drive? Aphoto box DIY giftensures those memories are preserved in a beautiful, meaningful way, ready to be enjoyed for years to come. It's not just a gift; it’s a legacy of love and laughter, packed in a box.
Why a Photo Box DIY Gift is Perfect | Reason |
|---|---|
Personal Touch | Handmade shows extra care and thought. |
Unique & Memorable | Stands out from generic store-bought gifts. |
Tangible Memories | Brings digital photos into the real world. |
Keepsake Quality | Preserves memories for years to come. |
Creative & Fun to Make | Enjoyable crafting process for the giver. |
Customizable | Tailored to the recipient's personality and occasion. |
Wrap Up Your Photo Box DIY Gift Masterpiece
So, you've journeyed through the steps of creating your own photo box DIY gift, and now you're ready to put the finishing touches on a truly special present. This isn't just another gift; it's a handcrafted token of love, a burst of memories waiting to unfold. Whether it's for a birthday, anniversary, or just because, your personalized photo box is guaranteed to bring joy and become a cherished keepsake. Forget store-bought trinkets, you've made something meaningful, something real. Go ahead, gift your explosion box and watch the memories bloom!