Table of Contents
Struggling to find the perfect packaging for that thoughtful little gift? Store-bought boxes can be pricey and impersonal, right? What if you could whip up a charming gift box yourself, in just minutes, with stuff you probably already have? Making your own gift box is not only budget-friendly but also adds a personal touch that mass-produced options just can't match. This article is your guide to creating a fantastic step by step easy DIY gift box, perfect for any small present or treat. We'll walk you through gathering simple supplies, mastering the basic folds, and even jazzing it up with your unique style. Get ready to ditch the store-bought stress and discover how fun and rewarding it is to make your own step by step easy DIY gift box!
StepbyStep Guide to Your Own Easy DIY Gift Box
StepbyStep Guide to Your Own Easy DIY Gift Box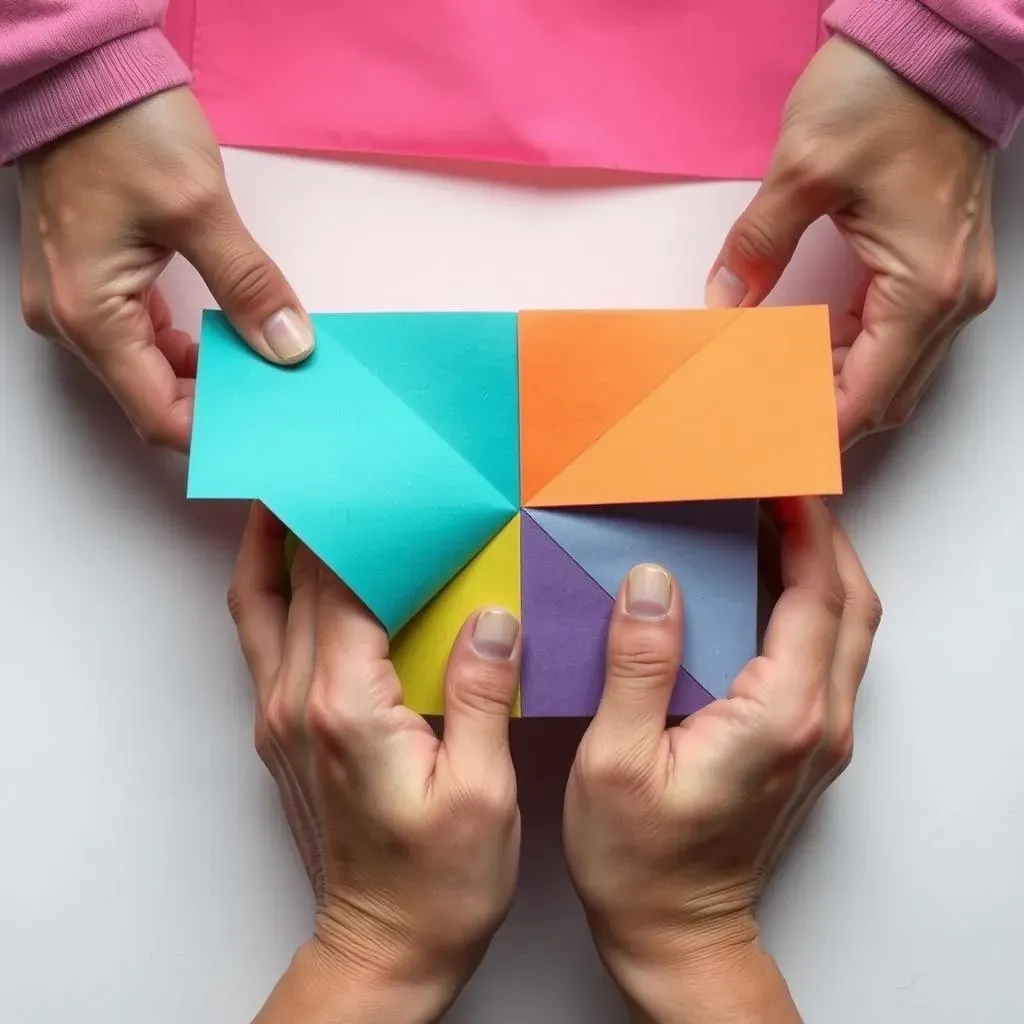
Getting Started: Your Paper and Basic Folds
Ready to dive into making your own StepbyStep Guide to Your Own Easy DIY Gift Box? Awesome! First things first, grab a piece of paper. Cardstock works best if you want a sturdy box, but even regular printer paper will do for practice or lighter gifts. Think about the size of your gift to decide how big your starting square should be. For a standard little gift box, a 6x6 inch square is a great starting point. Don't stress about perfection; this is all about having fun and creating something cool yourself.
Now, let's make that square if you're starting with a rectangular sheet. Fold one corner over to meet the opposite side, lining up the edges perfectly. Crease that fold sharply. See that extra strip of paper hanging off? Just snip it off along the folded edge. Boom! You’ve got a perfect square. Unfold it, and you'll see the crease – that's going to be helpful later. Next, fold your square in half, then in half again, each time creasing well. Open it up completely. You should see a grid of creases dividing your paper into smaller squares. These creases are your roadmap for box-making success!
- Start with a square piece of paper (cardstock recommended).
- Fold the square in half, crease, and unfold.
- Fold in half again in the other direction, crease, and unfold.
- You should now have a square with creases dividing it into smaller squares.
Gather Your Supplies for a Simple DIY Gift Box
Gather Your Supplies for a Simple DIY Gift Box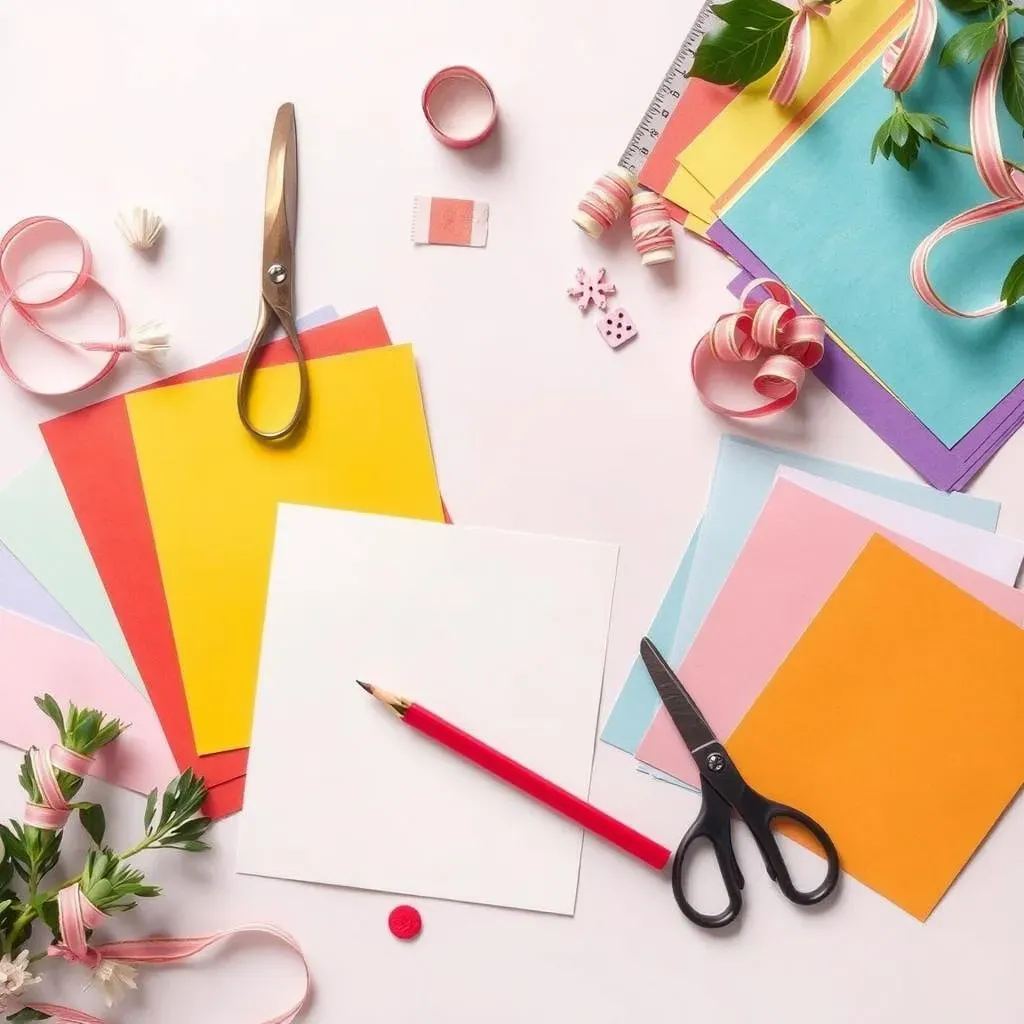
Paper is Your Foundation
Alright, ready to gather your supplies for a simple DIY gift box? Let's start with the star of the show: paper! Seriously, the type of paper you pick can totally change the look and feel of your box. For a sturdy, classic gift box, cardstock is your best friend. It comes in tons of colors and patterns, and it holds its shape like a champ. But hey, don't feel limited! Scrapbook paper is another fantastic option, especially if you want something with cool designs already printed on it. Even wrapping paper can work in a pinch, especially for a more delicate, decorative box. Just remember, thinner papers will be less sturdy, so maybe double them up or use them for very light gifts.
Essential Tools for Box Brilliance
paper sorted. Now, what tools do you actually need to make this Gather Your Supplies for a Simple DIY Gift Box project happen? Good news – you probably have most of this stuff lying around! First up, scissors. A good pair of scissors is key for cutting clean lines. If you're feeling fancy or working with thicker cardstock, a craft knife and a cutting mat can be super helpful for extra precise cuts. A ruler is also a good buddy to have on hand, especially if you want to measure and mark your folds beforehand to make sure everything is perfectly aligned. And lastly, grab a pencil or a pen to mark those measurements – lightly, so you can erase the lines later if you want a super clean finish.
- Paper: Cardstock, scrapbook paper, or wrapping paper
- Cutting Tool: Scissors or craft knife & cutting mat
- Measuring Tool: Ruler
- Marking Tool: Pencil or pen
Level Up with Decorations
So, you've got your paper and your essential tools – awesome! But wait, want to take your Gather Your Supplies for a Simple DIY Gift Box project to the next level? Let's talk decorations! This is where you can really let your creativity shine and personalize your box. Think ribbons! A pretty ribbon tied around your finished box instantly makes it feel more special. Stickers are another super easy way to add flair, especially for kids' gifts or themed boxes. And if you're feeling artsy, grab some markers, colored pencils, or even stamps to decorate the paper before you even start folding. Don't be afraid to experiment and make it your own – that's the whole fun of DIY!
Folding Magic: Creating Your Step by Step Easy DIY Gift Box
Folding Magic: Creating Your Step by Step Easy DIY Gift Box
Making the Base Folds
Alright, this is where the real Folding Magic: Creating Your Step by Step Easy DIY Gift Box starts to happen! Remember those creases you made earlier? They are like magic guides. Lay your square paper flat, and picture it as nine smaller squares thanks to your folds. Now, take scissors and cut along the fold lines up to the second crease from each corner. Basically, you're making four cuts, one from each corner, stopping before you reach the very center square. Don't worry if that sounds confusing, just look at the pictures if you get stuck – visual aids are lifesavers! These cuts are what let you actually fold the paper into a box shape, instead of just a flat piece of folded paper. It's like unlocking the secret to box-making!
Next up in our Folding Magic: Creating Your Step by Step Easy DIY Gift Box adventure, we're going to start shaping the box. See those corner squares you just created with your cuts? Fold in two opposite sides so their edges meet in the middle. Imagine you're starting to close a book. Do the same with the other two opposite sides. Now, you'll see flaps forming on each side. These flaps are going to interlock to create the sides of your box. It might feel a little fiddly at first, but just take your time and gently encourage the paper to fold along those creases. This is where you see the flat paper magically transforming into a 3D box shape – pretty neat, huh?
Assembling Your Box
Time to finish off our Folding Magic: Creating Your Step by Step Easy DIY Gift Box and actually put it all together! Those flaps we made? They're designed to tuck into the slots created by the folds on the opposite sides. Take one flap and gently slide it into the corresponding slot on the side panel. Do the same with the flap opposite to it. You might need to wiggle things a little to get them to tuck in snugly. Repeat this for the remaining two flaps. And just like that, you've assembled the base of your gift box! Give it a little press to make sure all the flaps are secure and the box is holding its shape. You've officially gone from flat paper to a functional, adorable little box – high five!
Now that the base is done in our Folding Magic: Creating Your Step by Step Easy DIY Gift Box project, you can decide if you want to make a lid. A lid isn't essential, especially for smaller gifts, but it definitely adds a polished touch. To make a lid, simply repeat the exact same folding process with another square of paper, but this time, start with a square that's about ¼ inch bigger on each side than your box base. This slight difference in size will allow the lid to fit snugly over the base. Follow all the same folding steps, assemble it just like the base, and then pop it on top. Voila! A complete, handmade gift box, ready to be decorated and filled with something special.
Step | Action |
|---|---|
1 | Cut along fold lines from corners to second crease. |
2 | Fold opposite sides to meet in the middle. |
3 | Tuck flaps into slots to assemble the base. |
4 | (Optional) Make a lid using a slightly larger square. |
Personalize Your DIY Gift Box: Decoration and Variations
Personalize Your DIY Gift Box: Decoration and Variations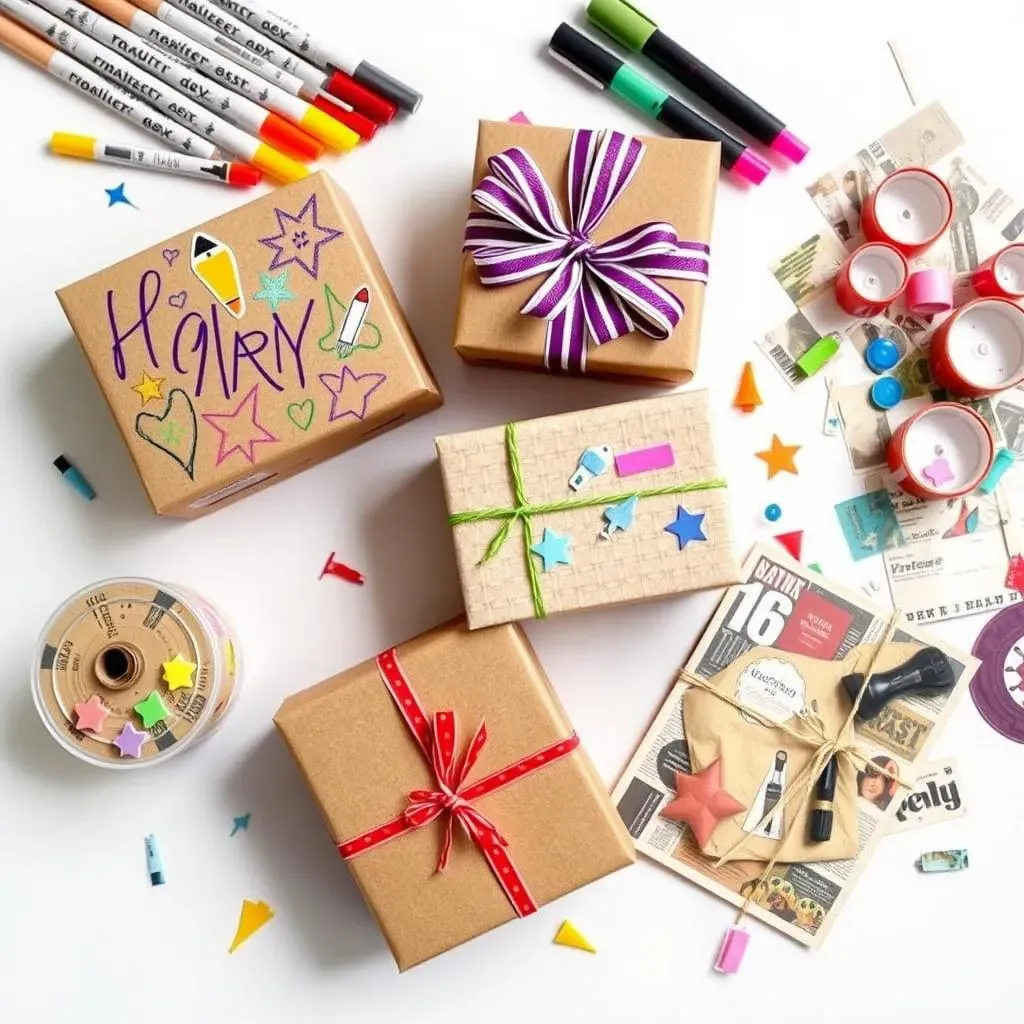
Unleash Your Inner Artist
you've got the basic box down, awesome! But hold up, we're not finished yet. This is where Personalize Your DIY Gift Box: Decoration and Variations really kicks in and you can turn a simple paper box into something truly special. Think of your box as a blank canvas. Grab some colorful markers, pens, or even paint and go wild! Doodles, stripes, polka dots, geometric patterns – whatever makes you happy. If you're gifting it for a birthday, draw some balloons or candles. For the holidays, snowflakes or little trees are perfect. Get the kids involved too; they’ll love adding their own scribbles and drawings. It's all about making it personal and from the heart.
Ribbons, Stickers, and More!
Want to add some extra pizzazz to your Personalize Your DIY Gift Box: Decoration and Variations masterpiece without spending a ton of time? Ribbons and stickers are your secret weapons! A simple ribbon tied around the box instantly elevates it. Choose a color that complements your paper or go for a fun contrast. Stickers are also fantastic, especially themed ones. Got a space-loving friend? Rocket and star stickers! Know someone with a sweet tooth? Candy stickers galore! Washi tape is another amazing option – it comes in a million patterns and colors and it's super easy to use. Just tear off strips and stick them on to create borders, patterns, or even spell out names. Don't underestimate the power of these little touches; they make a big difference.
Paper Variations for Extra Flair
Feeling adventurous with your Personalize Your DIY Gift Box: Decoration and Variations journey? Let's talk paper variations! Remember we talked about cardstock and scrapbook paper? Well, how about textured paper? Paper with a subtle linen texture or a bit of shimmer can add a touch of elegance without any extra effort. Or get really creative and use recycled materials! Old magazine pages can create a cool collage effect, and brown paper bags give a rustic, eco-friendly vibe. You could even use fabric scraps if you're feeling crafty – just glue them onto the paper before folding. Experiment with different paper types and see how they change the whole look and feel of your DIY gift box. It's all about having fun and making it uniquely yours!
Decoration Idea | Materials | Perfect For |
|---|---|---|
Drawing/Painting | Markers, paint, colored pencils | Personalized messages, themed art |
Ribbons & Stickers | Ribbons, stickers, washi tape | Quick & easy embellishments, themed boxes |
Paper Variations | Textured paper, recycled materials, fabric scraps | Unique textures, eco-friendly look |
Wrapping It Up: Your Step-by-Step Easy DIY Gift Box Success
So there you have it! Crafting your own step by step easy DIY gift box is simpler than you might have imagined, isn't it? From gathering your basic supplies to those final, personalized touches, you've seen how quickly a plain piece of paper can transform into a cute and functional gift container. Whether you're adding a handmade touch to a birthday present or just want a charming way to package a small treat, these DIY gift boxes are a winner. Now go ahead, get folding, and bring a bit of handmade happiness to your next gift-giving occasion!